
Disney-Bounding 4 – I’m playing sewing detective
- No Comments


Though there are about twenty people missing from these photos, I’m trying to emulate the mother from “Rhapsody in Blue” in Fantasia 2000.


I had wanted to do Me-Made bounds… but before you get excited about the dress, let me confess that I didn’t make this one. How fast do I give up on good intentions?! I got to choose the bound for the week! Still, when I looked through my closet I decided I didn’t have any thing homemade I wanted to wear.

Instead, I pulled out this vintage dress from the 1930s, around the time period shown in the Disney flick. I bought it during a trip to San Francisco in 2006. Though I wore it a few times, I didn’t think much about how it was sewn until last year, when I held it up to a bright window to check for moth holes. Instead of insect bites, I found a straight line of marking holes across the bodice front.
Somebody had altered this dress, and I had just discovered the last signs of the dress’s true design.
Here you can see the inside front waist. The six pleats about the waist have been stitched by hand with small running stitches. These were not meant to be in the dress.
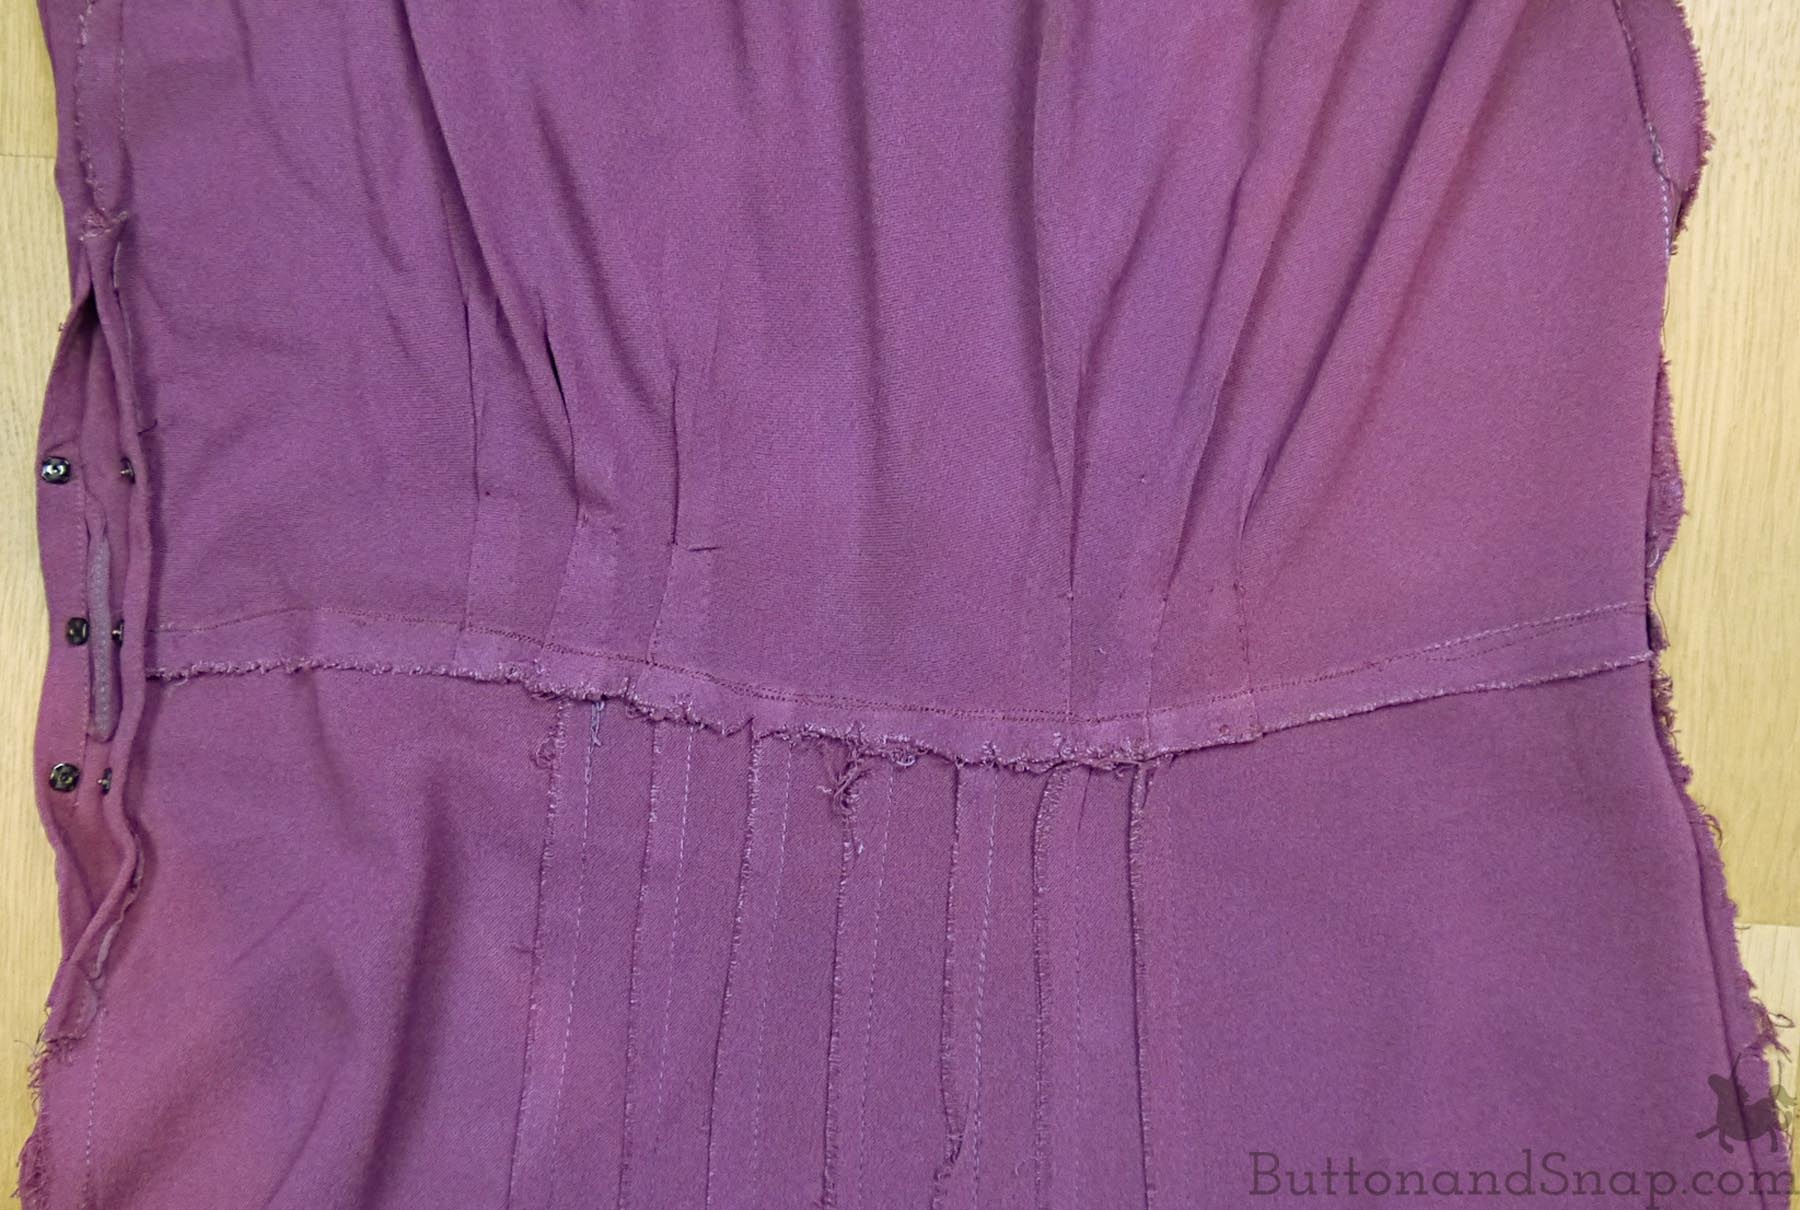
Holding the dress to the light shows a different story. The line of bright white dots show where threads have been pushed out of the way. These dots mark the ends of the original pleats. The seam lines are also still visible under careful scrutiny.

I’ve drawn in five of the seven total pleats here. Parts of them are obscured by the new darts. They are also actually straight. They looked curved here simply because the dress isn’t laying completely flat. The arrows mark which seams would have been joined together.
Clearly, these pleats lined up with the seams between the panels in the skirt. They would have formed vertical seams that ran from the bodice to the skirt hem, giving the design a more cohesive look.

Once I had found this, I took a closer look to see what else the dress has to reveal.

As you see in the picture below, the shoulder seam to the yoke seam in this picture, you can see that the yoke seam has been sewn with a much smaller stitch (smaller than it should be) and is much less straight. This seam is was opend up and the pleats here were changed as well. Because the stitches are was too small, I suspect that the person doing the alteration is less skilled than the original dressmaker.

Moving on from the alteration, let’s contemplate other dress details. Looking at the back, it is clear that the beading has been professionally done by machine. The rhinestones are mounted on metal backs.


The dressmaker has cut the back facings so that the edges are the fabric selvage. Since selvages don’t ravel, she doesn’t have to finish the edges. This isn’t the only practical use of selvages in the garment.
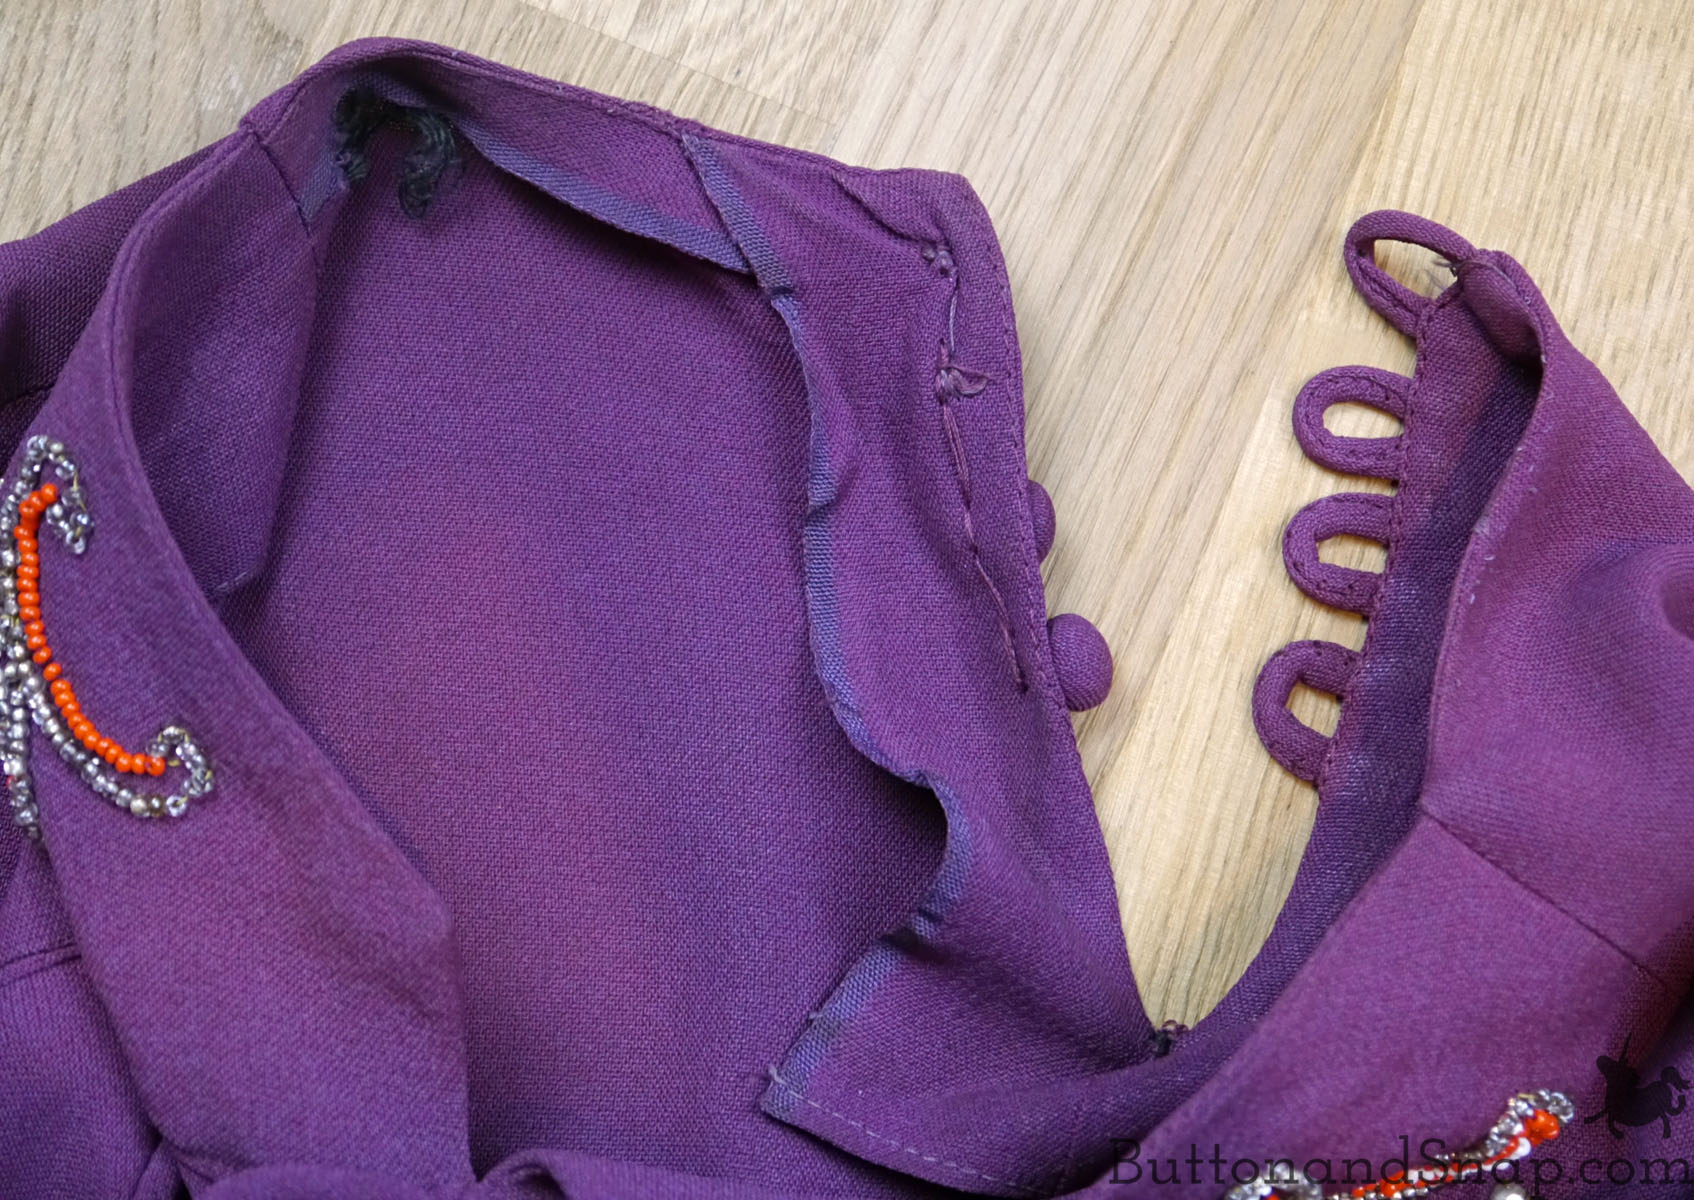
The belt loops are also cut from the selvage, folded with the selvage out, and top-stitched in place. What a great way to make a narrow tube!

The snap closure at the side waist also utilizes selvages.

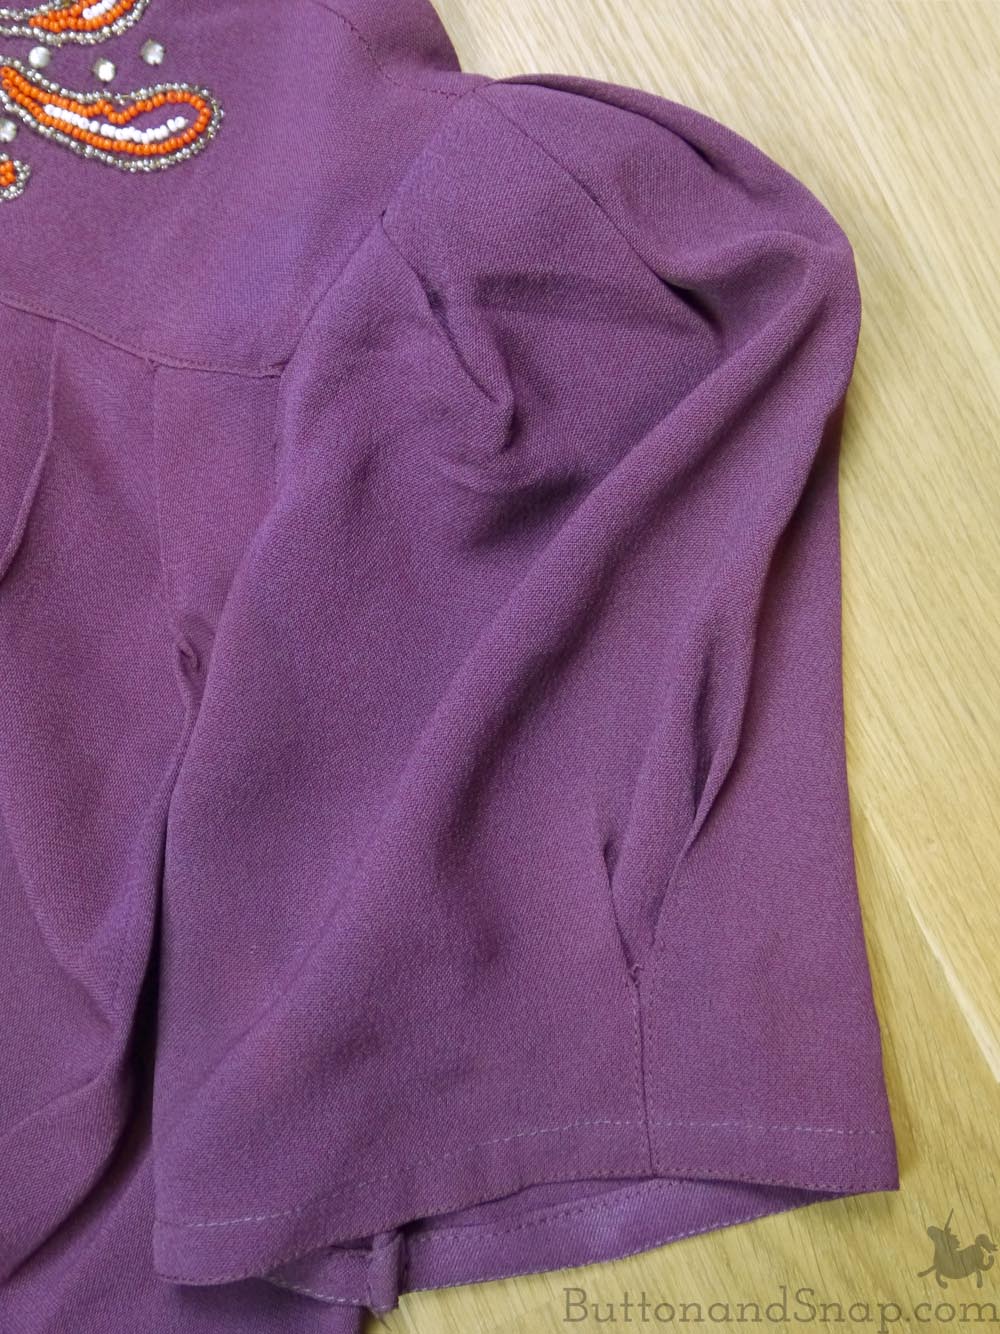
In the above picture you can also see the sleeves have small pads sewn into the shoulder to fill out the puffs.

Small pleats shape the sleeve at the shoulder. An inverted pleat, topstitched in place, takes in the fullness at the bottom.
Here you can see that the hem has been topstitched twice. The thread colors on these two top-stitched seams are different – the top seam is gray, while the bottom seam is matches the dress. A look at the inside of the seam reveals the the opposite colors. This suggests that the seamstress was using a different thread in the bobbin than on the top spool. She most likely stitched the top steam first with the wrong side facing up so she could follow the folded edge of the hem allowance. Then she stitched the bottom seam with the right side facing up.
It could be that the bobbin thread has faded to gray with time, or it could have always been gray. I don’t enough knowledge to say for sure – if you know, please tell me!

The belt has the same finish with the bobbin thread showing on the right side. The wrong side is a stabilizer that is showing clear signs of wear and tear.

Now let’s look at the skirt. It has five narrow panels fanning out in the front. Interestingly, the fullness of the skirt is not evenly spread out. A look at the back reveals a straight pencil cut.

You can see this clearly when I lay the dress out flat. Here, the side seams are clearly being covered by the front of the skirt near the hem, since the front is wider than the back.

If I arrange the dress so the side seams are visible and the side front pieces are laying flat, you can see the deep fold of extra fabric.

It is worth noting that the skirt front is not uniformly flared. Rather, the fullness concentrated in the center front. If you look at it on me, you can see this: the folds of extra fabrics pool at the center.
 As it turns out, I can learn a lot by taking a peek in at a dressmaker’s work from 80 years ago. Not only do I know how this dress was meant to look, I now have some new ideas for using selvages and making sure that puffed sleeves puff.

Have you learned a new sewing technique or found anything surprising while taking a look at clothing someone else made? If you have, share it with me in the comments!
Leave a Reply