Atomic criss-cross dress
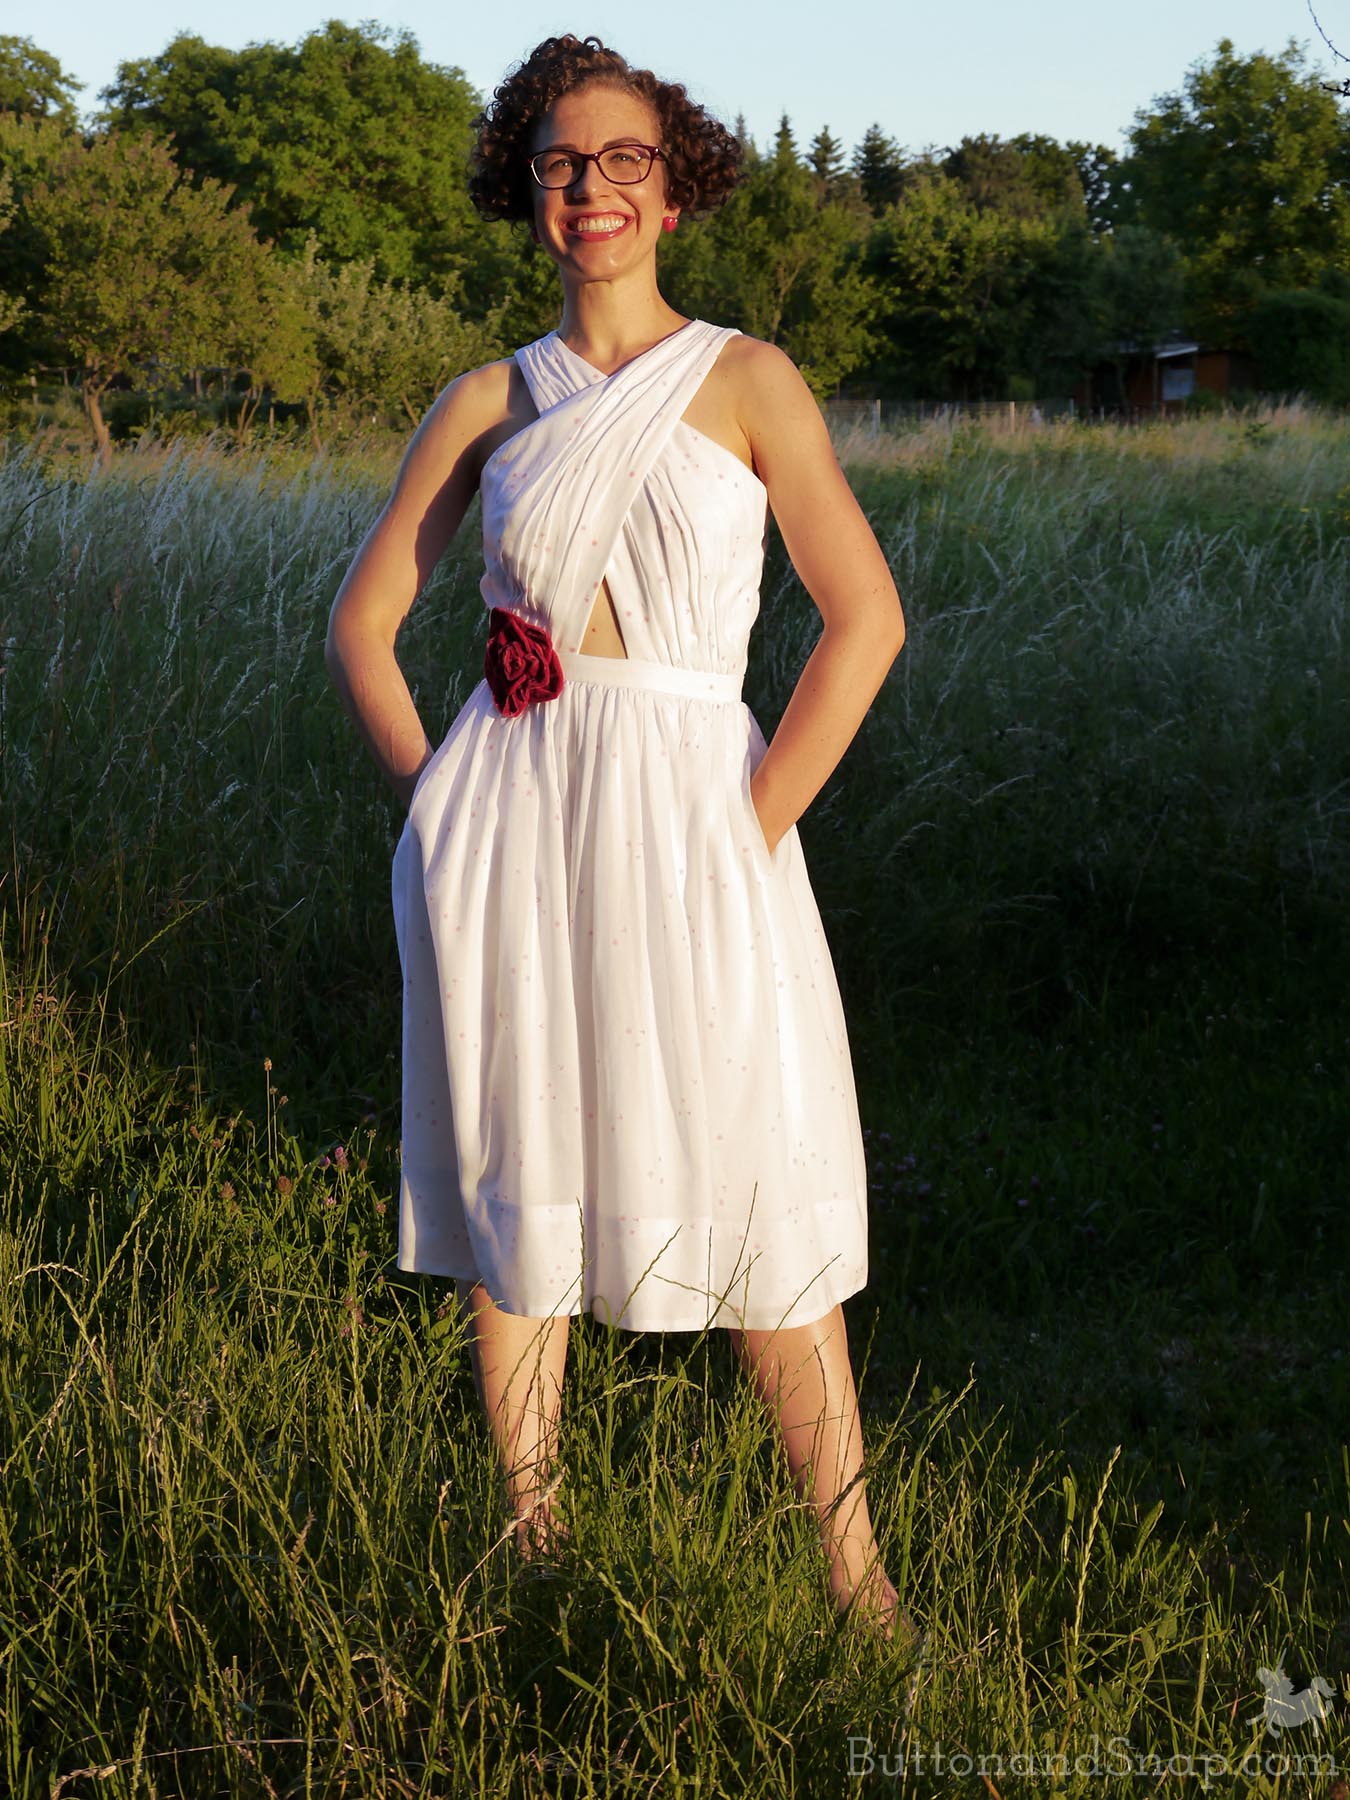
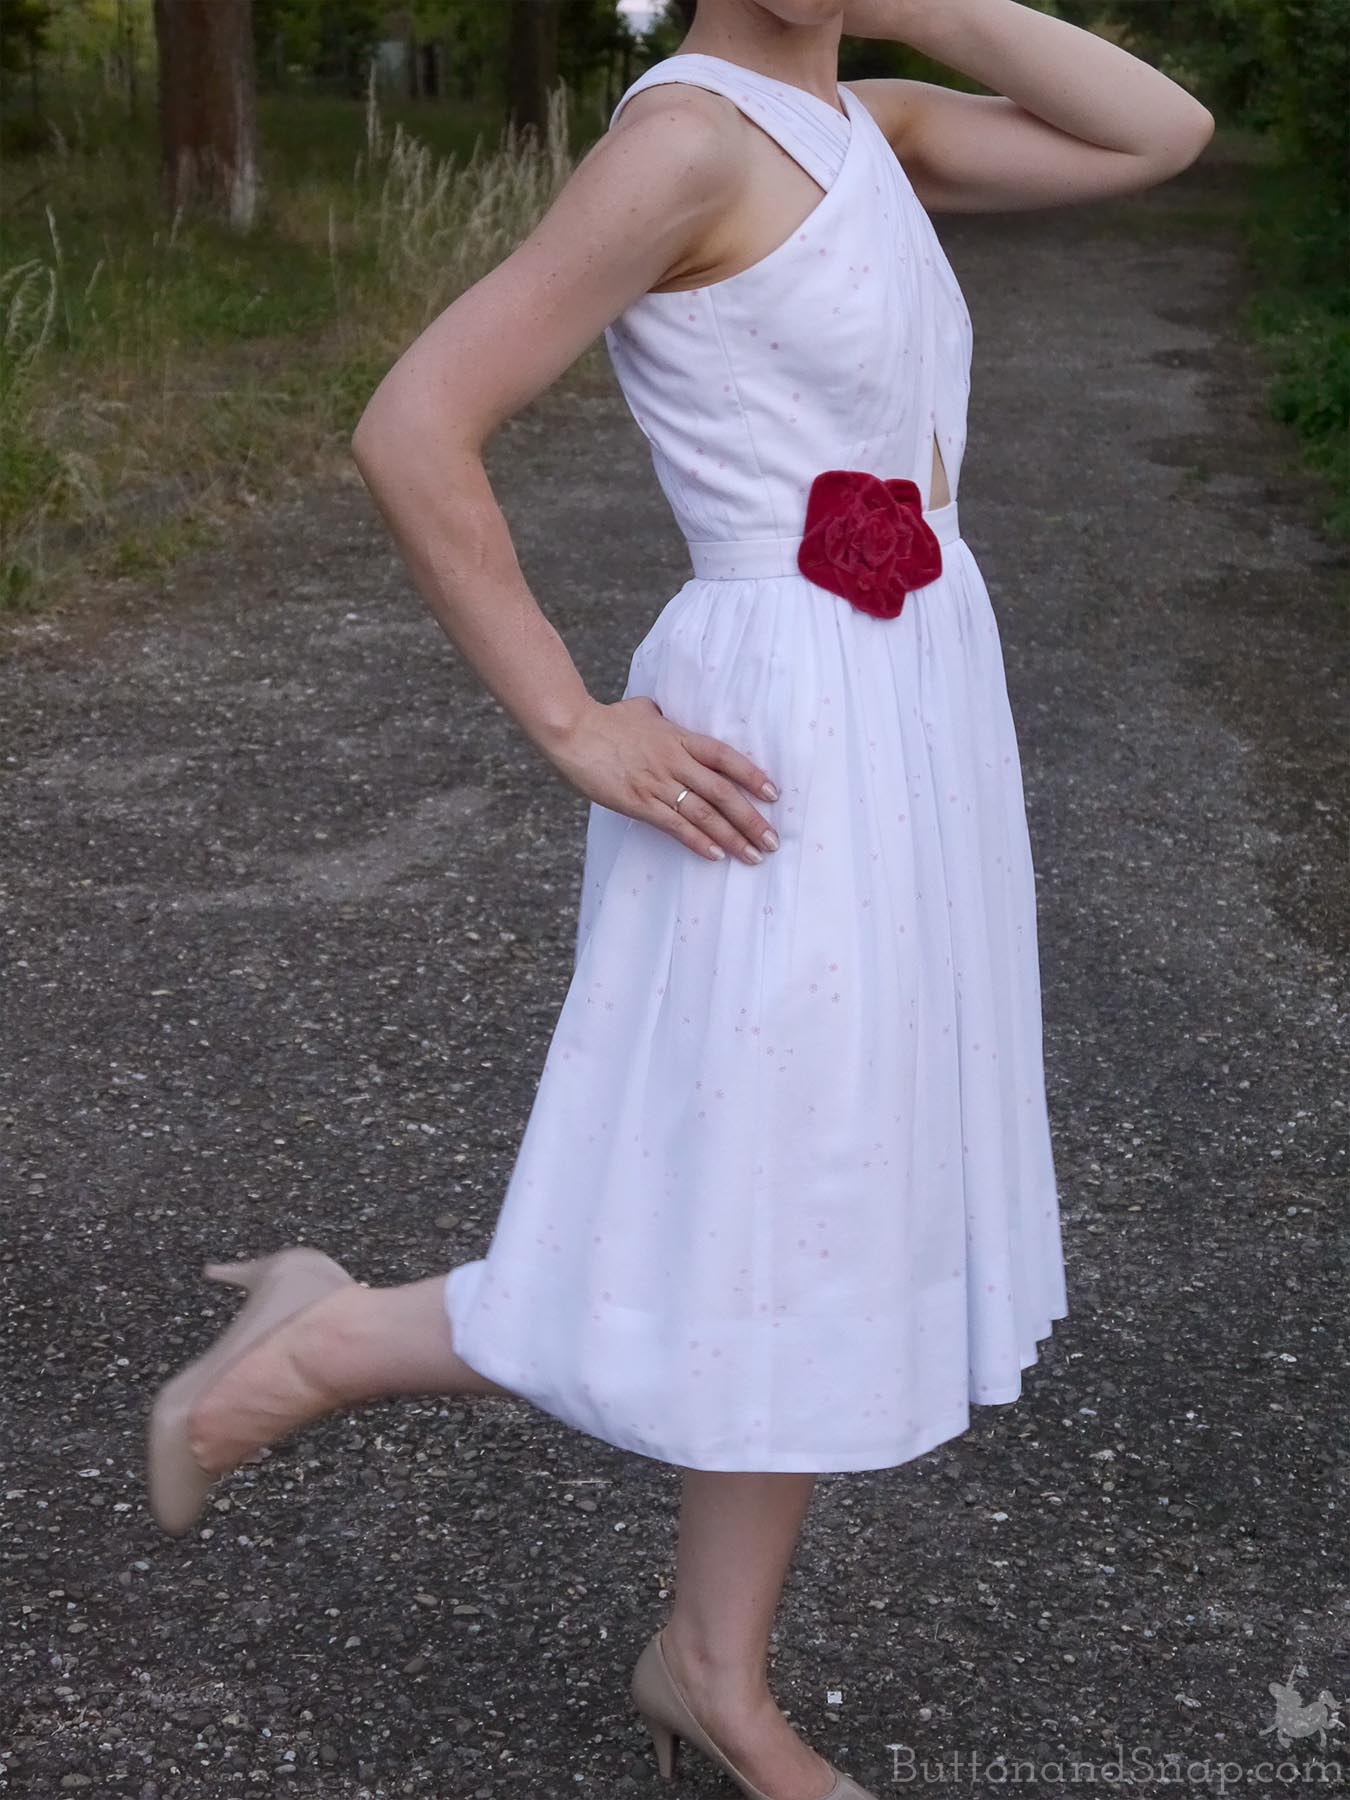
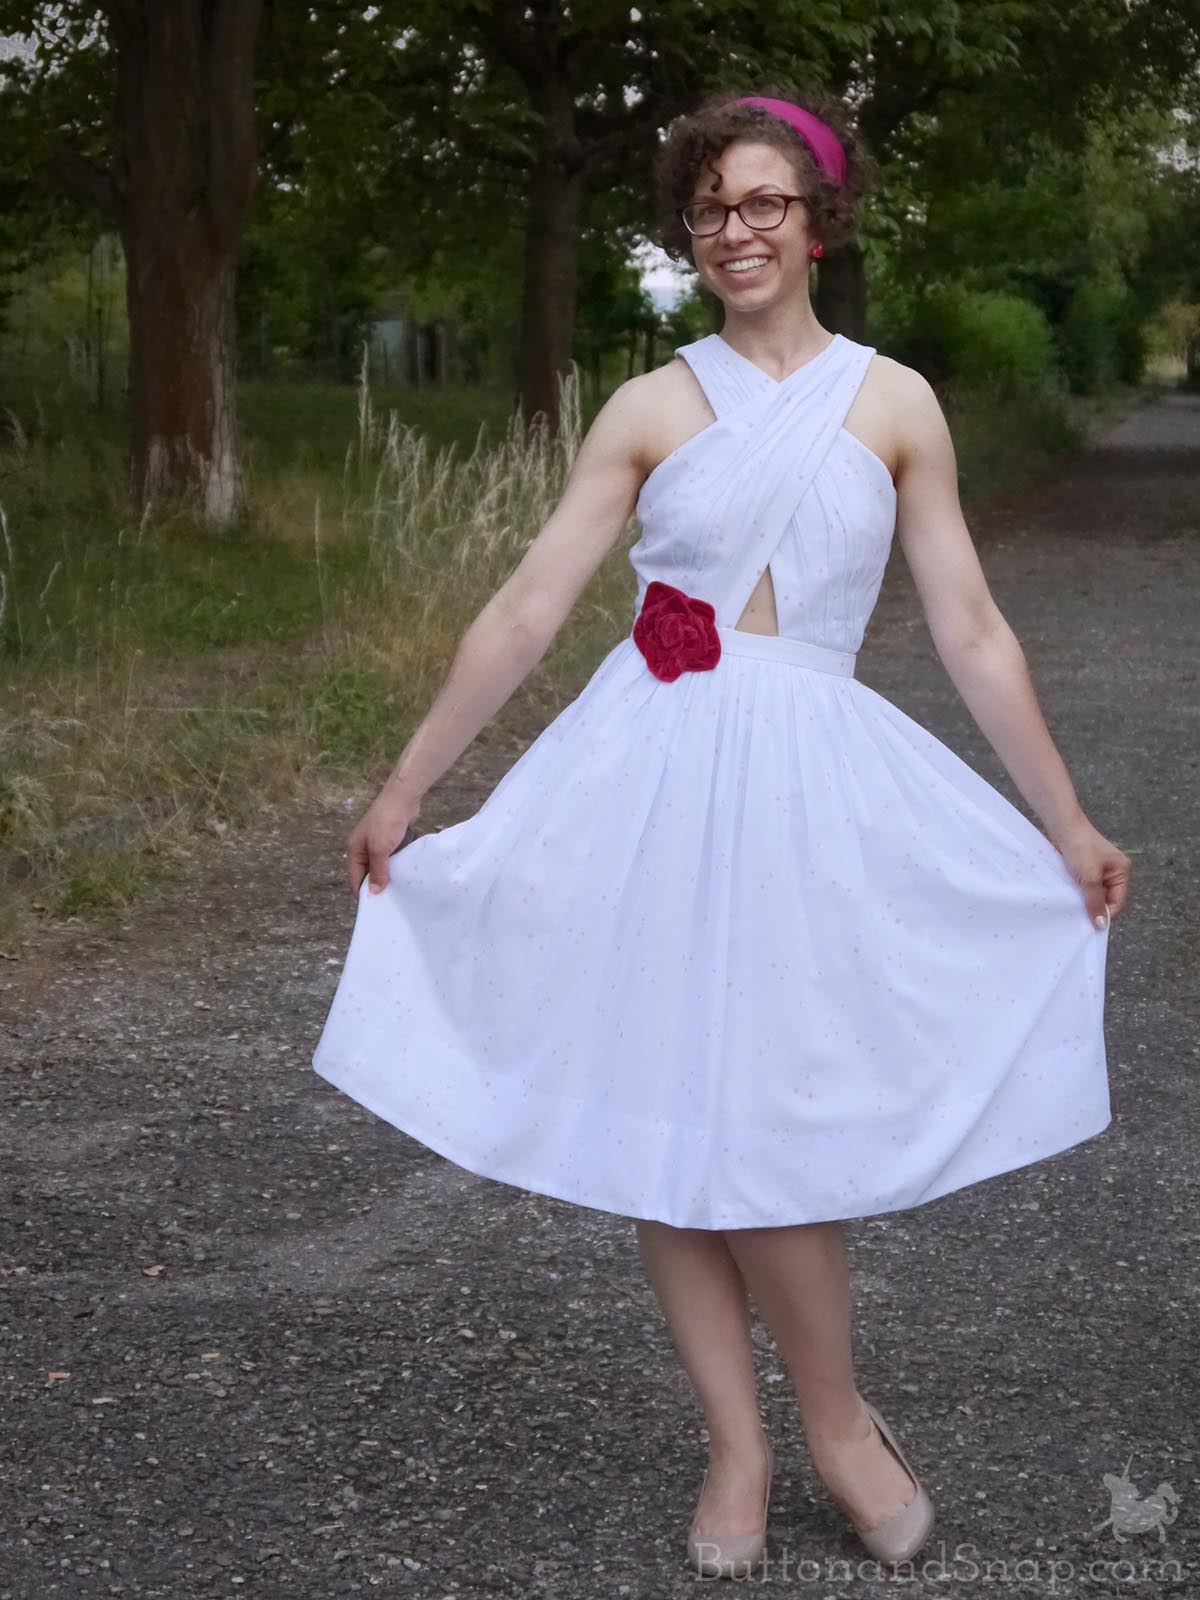
I’ve been working on my pattern-making skills lately. After drafting my own basic block – a plain fitted dress pattern used as the base for creating more complicated styles – I tried making a few of my own designs. This style was my favorite, so after trying it out in muslin, I made it into a dress.
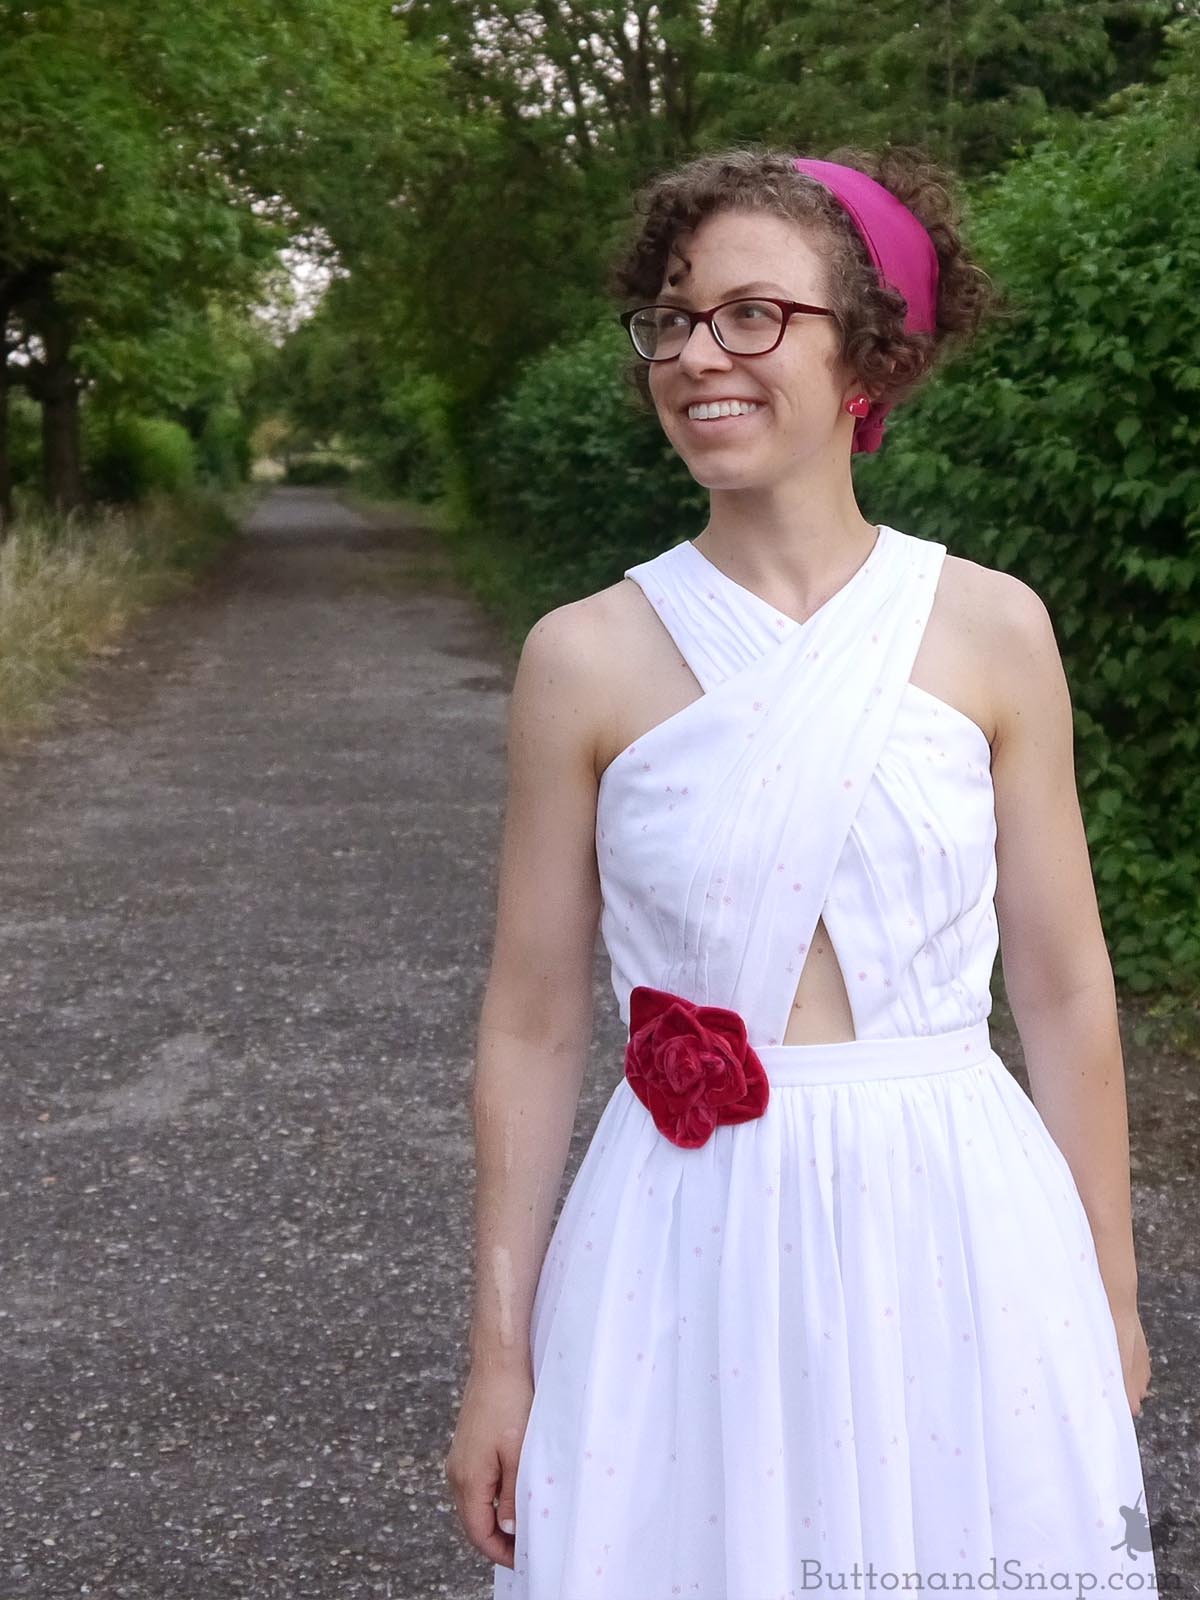
The bodice is inspired by the Ailakki Jumsuit by Named Patterns. I love their unusual, upside-down take on a wrap top. However, I wanted my own version: rather than going for Ailakki’s sleek modern look, I injected some soda-fountain sweetness from 1950s summer dresses into the design.
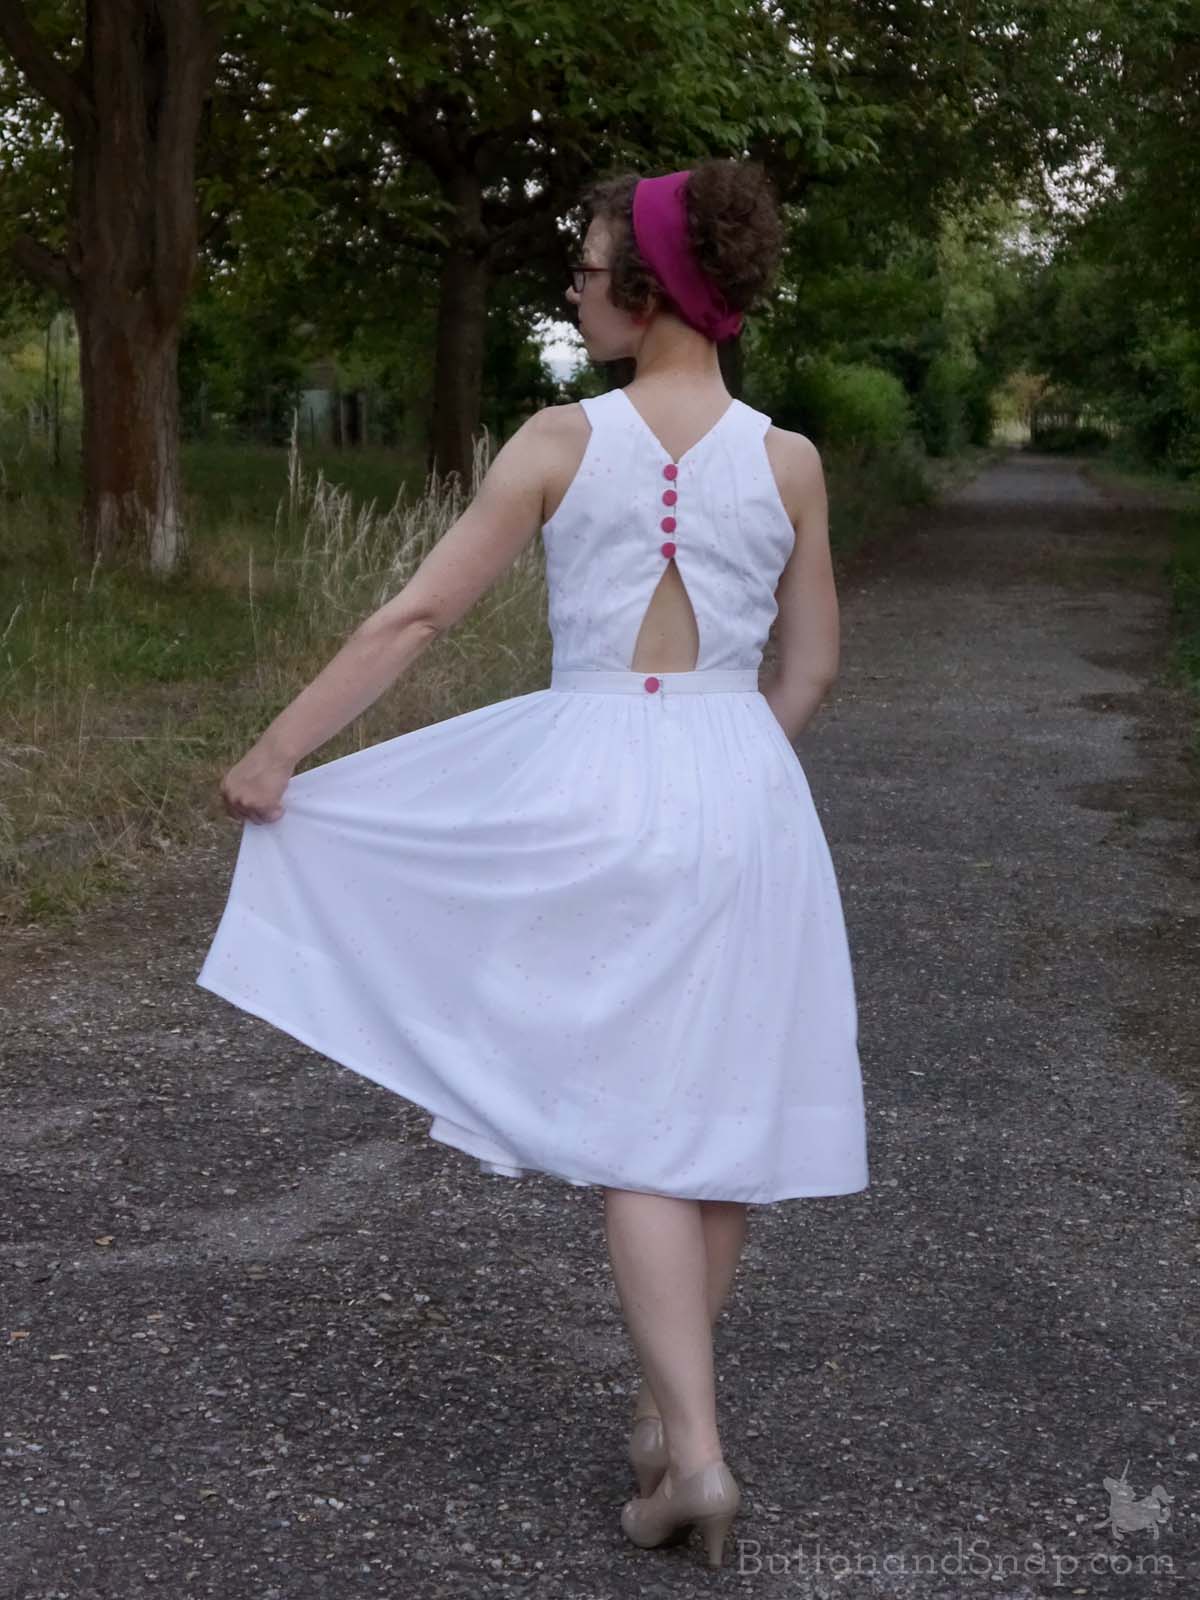
So, although I drafted a close-fitted, sleek bodice, I added a gathered layer of pale blue cotton voile with tiny pink starbursts over the top. And I balanced the skin-baring top with a big, full, gathered skirt.
Prick stitching the gathers in place
It is notoriously difficult to convince all-over gathers on a fitted top to stay in place.
I remember my mom making prom dresses for my sisters in the early 2000s, when ruched chiffon bodices were in style. She agonized over the ruched fabric, which refused to form small gathers spread out across the bodice – hanging instead in a big lumpy fold at the sides of the bust.
But there is a trick to coax the fabric into opedience: I mounted the fashion fabric onto the muslin backing, and pinned the gathers into place. Then I secured each fold using prick stitches – i.e., small backstitches spaced far apart. I worked my way up each fold, stitching about every 3/4″. In this picture, you can see the prick stitched folds on the right (but can you seen the prick stitches themselves??) On the left is the wrong side, where the float threads between each prick stitch are visible:
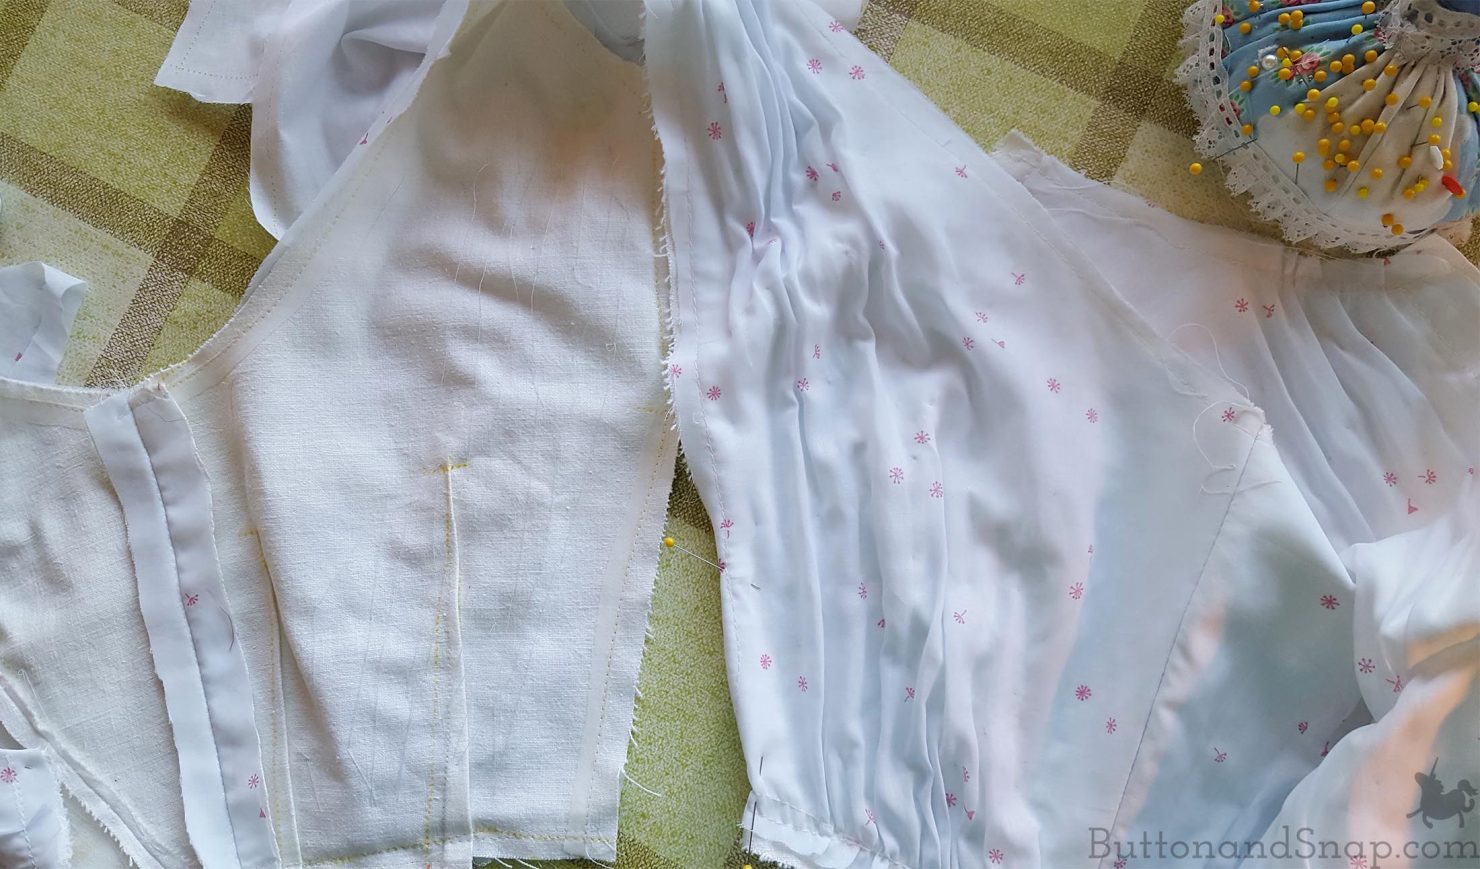
See, these tiny hand stitches are nearly invisible from the right side, and are an effective way to get the gathering to fall the way I want.
Cut bulk with a circular lining
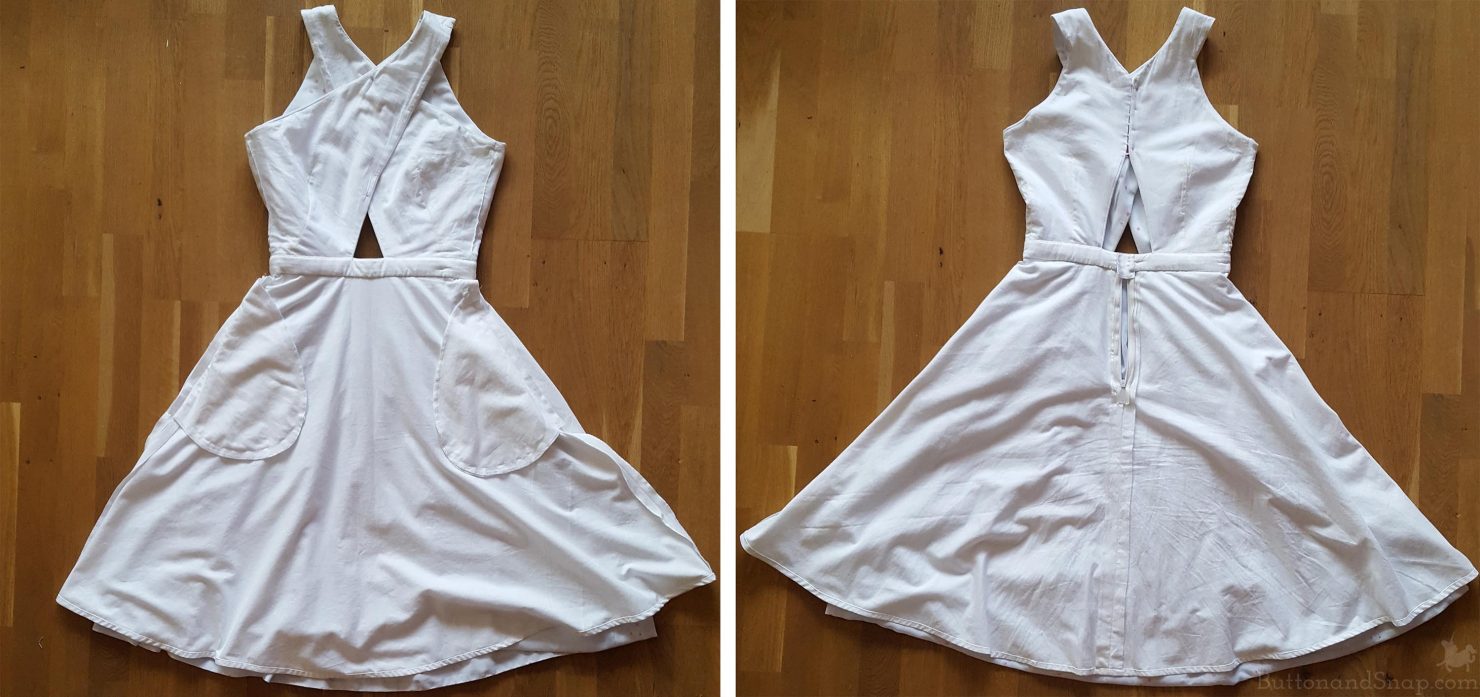
I wanted the outer skirt to mirror the gathered bodice, so I cut a 3-yard long rectangle of cotton voile and gathered it on to the waistband. But this airy, romantic style can really add volume to the waist and hips – not my goal. So I cut the lining with a different kind of geometry. It’s a half-circle skirt, calculated to skim close to my waist and hips, but match the fullness of the overskirt at the hem.
Here’s an inside view:
Fitting: A balancing act
Since the bodice has so many openings that getting the pattern to fit was a balancing act – if I pulled one seam too tight, a different part would gape open.
Here’s a photo of the back mid-fitting – I took pictures to check the fit in the back rather than twisting to see myself in a mirror.
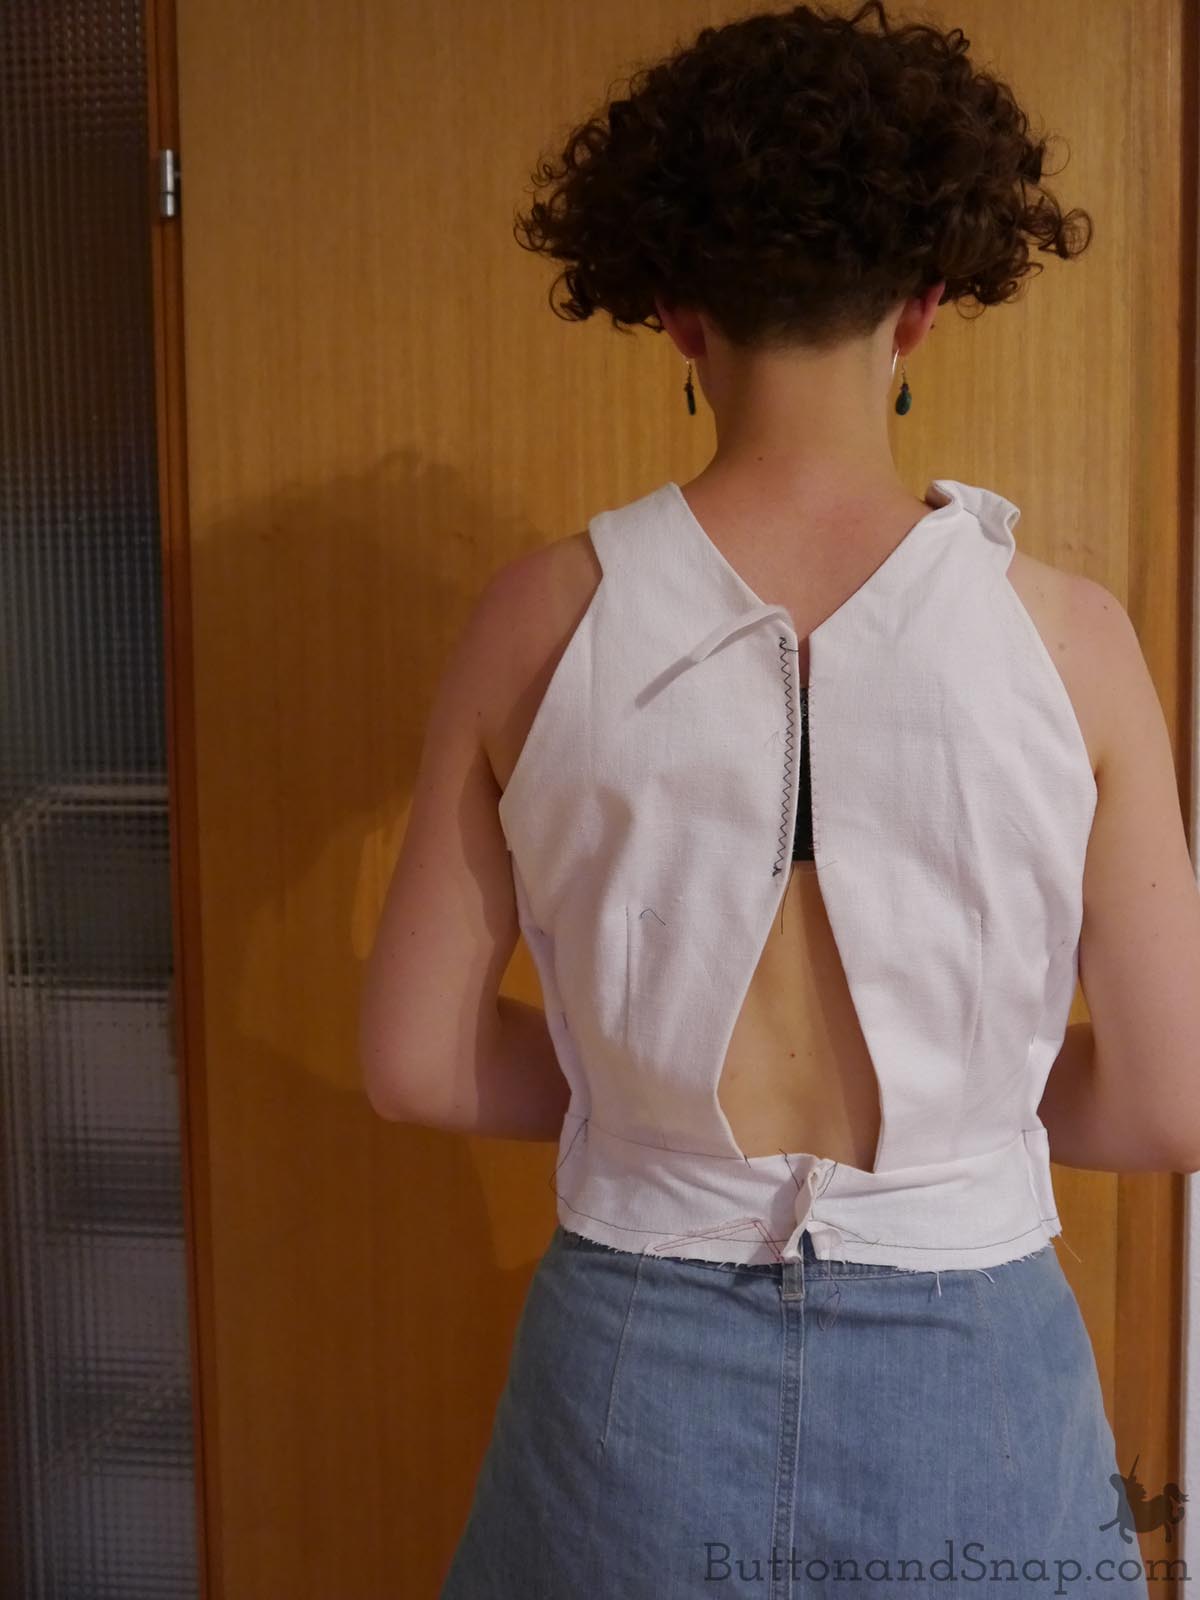 After looking at this photo, I decided that CB needs to be shortened at the waist by about a 1/4″ and the underarms need to be lowered by at least 1/2″.
In the picture, you can see that the right shoulder is pinned up an inch, as my left shoulder is higher. However, I ended up taking that pin back out and making both sides symmetrical – an example of how I kept going back an forth to try and get the fit right.
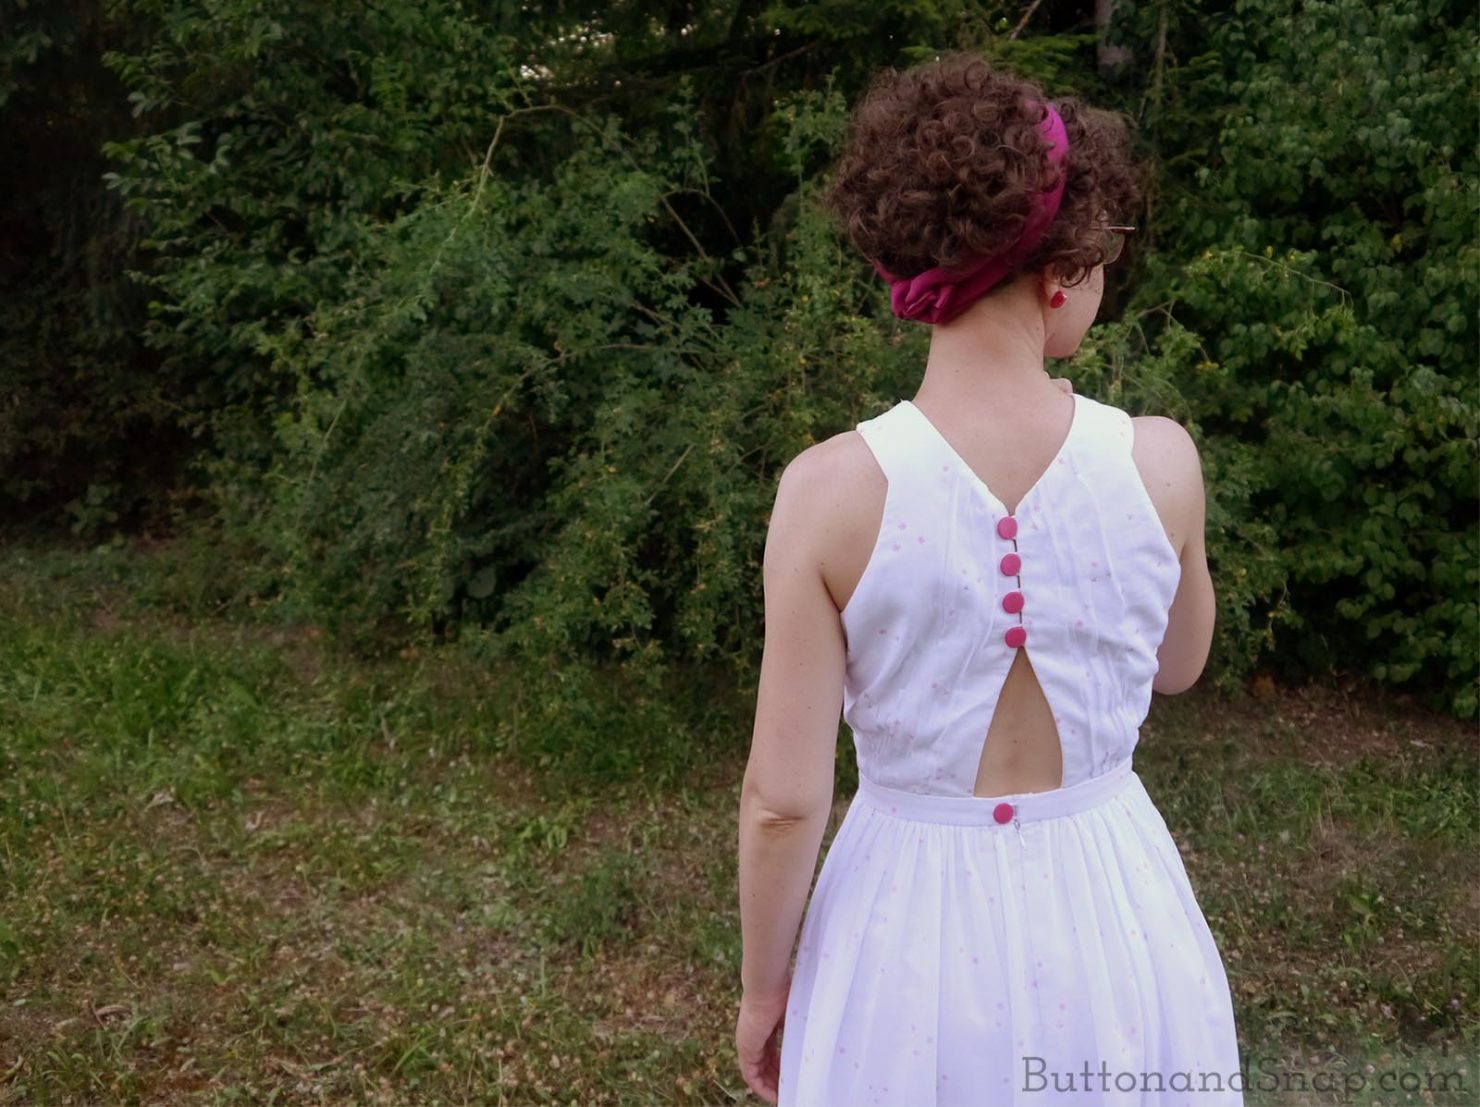
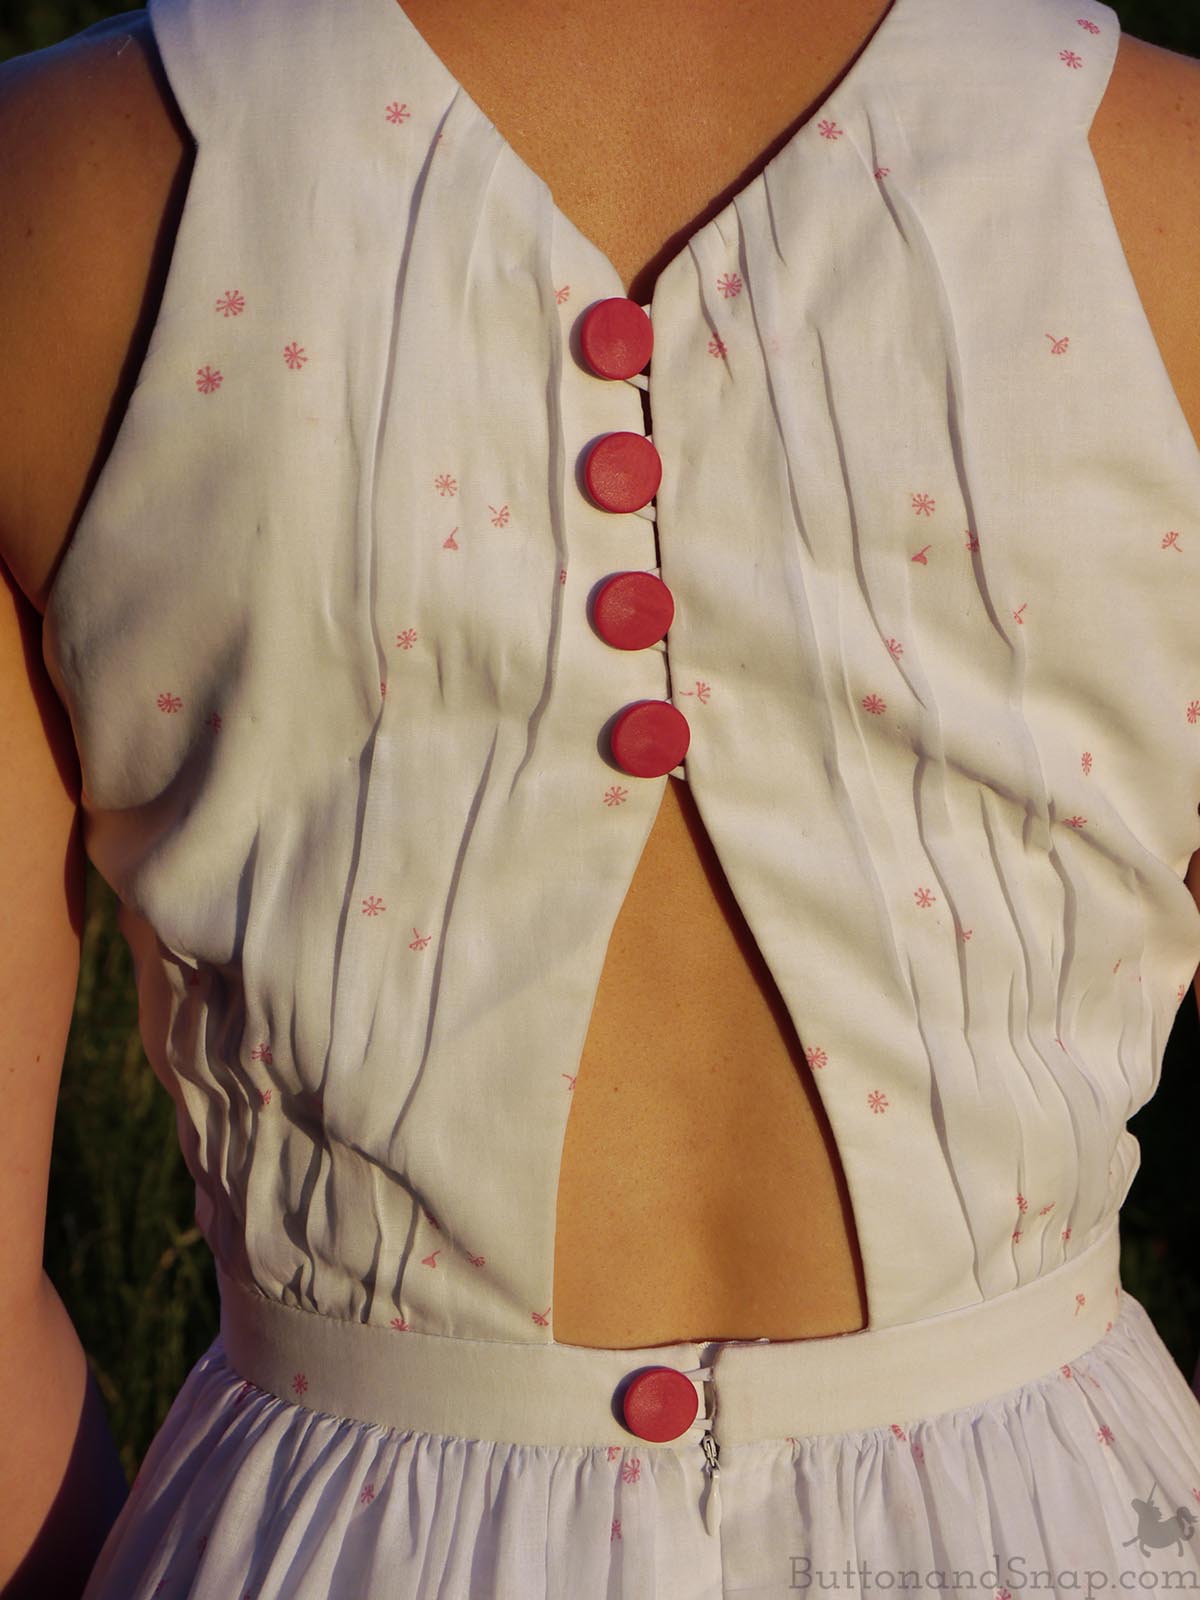
For comparison, here’s the finished back:
Swing tacks for security
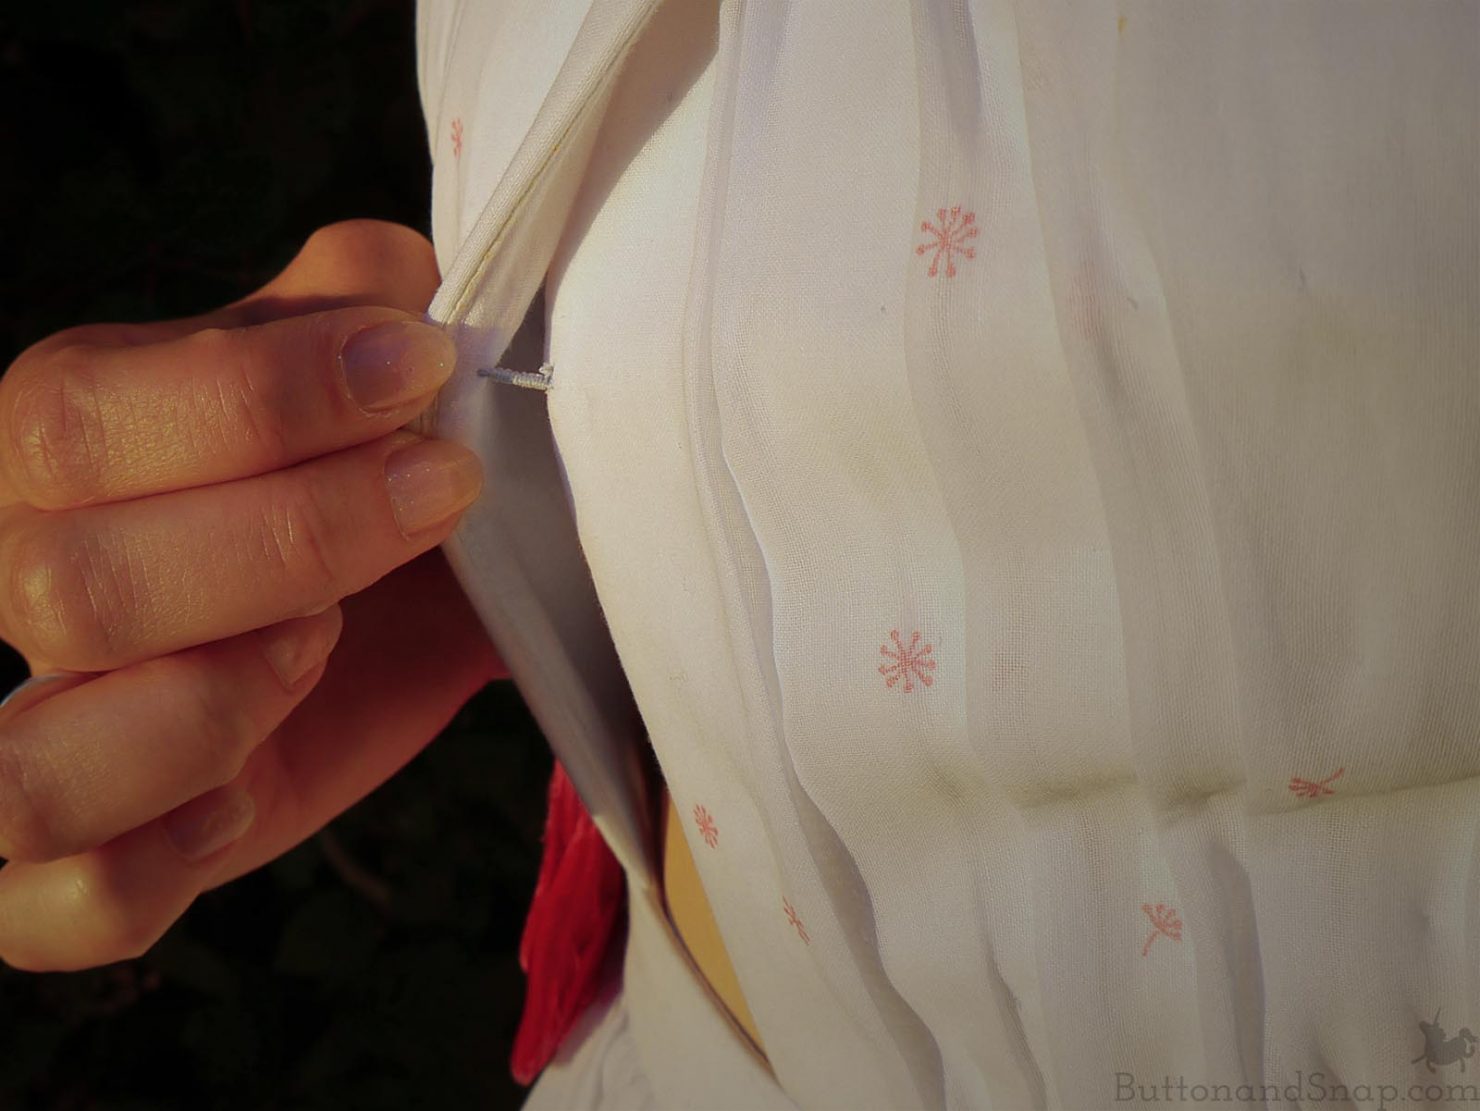
Despite my careful fitting, I wanted extra assurance that I wouldn’t haven any wardrobe malfunctions. After all, the front might gap when I move or sit.
So I added two swing tacks center front. These tacks are 1/2″long, allowing the straps can still move around naturally so they don’t look joined together. But they still add some extra security and modesty. One swing tack is at my neck, and the other above my navel.
Punch it up with pink
The pale blue voile looked a little blaah all by itself. It need a big pink focal point to make the dress shine. And a big pink rose seemed like just the thing for my atomic 50s dress.
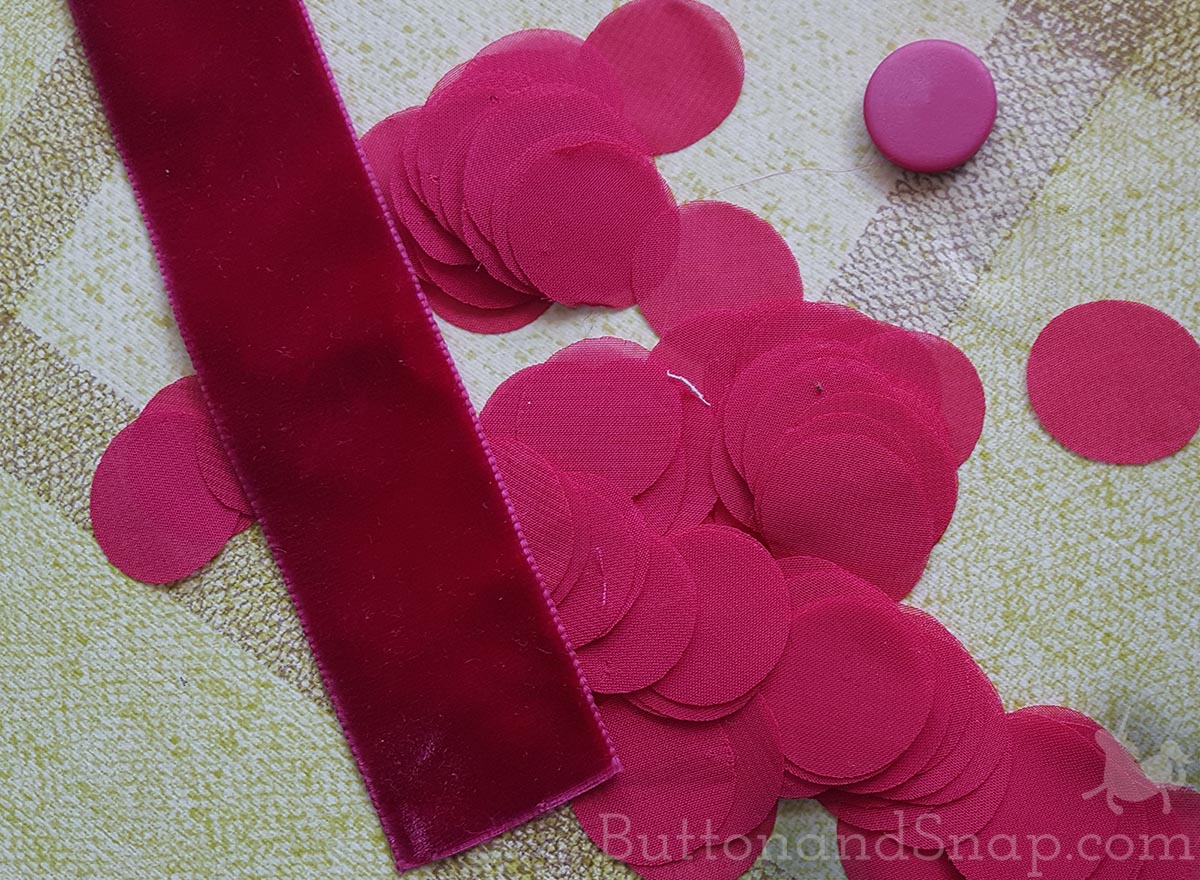
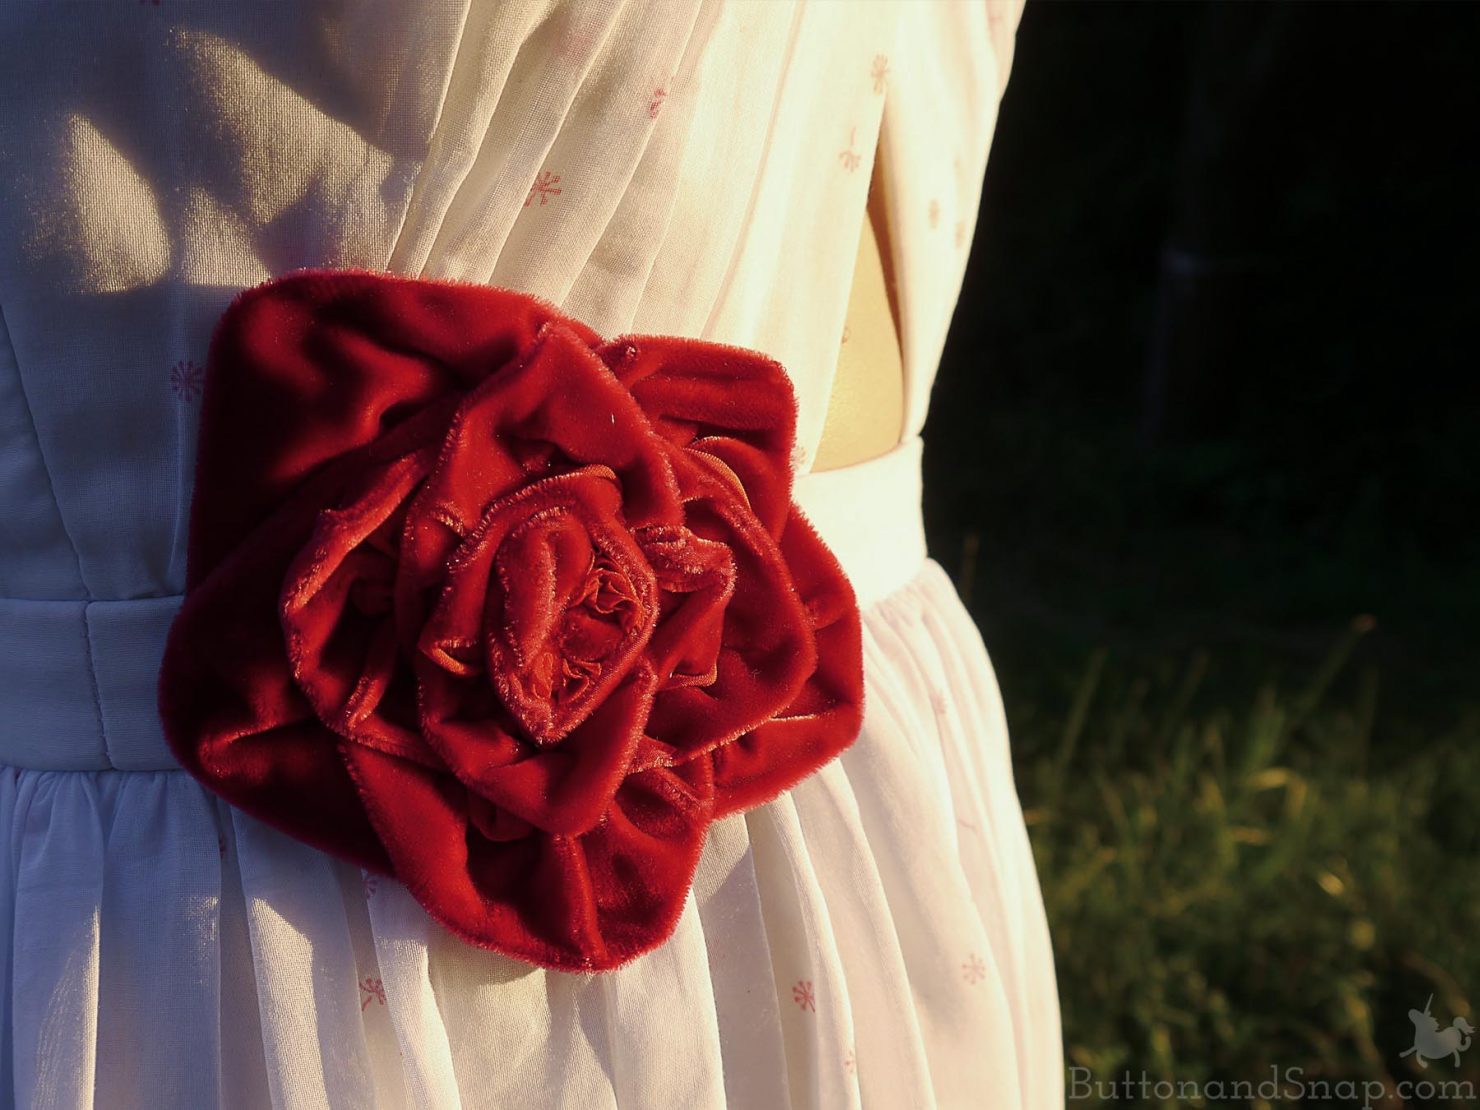
Since I didn’t have a silk rose on hand, I tried making my own rose from some velvet ribbon and chiffon circles I had in my trim box. I fiddled and experimented and stitched for one whole sunny Sunday afternoon, and came up with this version of nature’s delicate flora:
I’m pretty sure my rose, in all its loveliness, shares one trait with the real thing: it wouldn’t survive a trip through the washing machine. So, I’ve loosely hand-basted it on with about 10 running stitches, and I’ll have to remove it every time I give the dress a wash.
At last, some closure
Since the rose isn’t visible from the back, I gave that side of the dress its own personal pop of color in the form of pink button. In lieu of buttonholes, I made loop closures from tiny bias tubes.
At the back waist, I added underlap so the loop closure doesn’t gap. It’s just a ribbon folded in half and hand-stitched onto the waistband.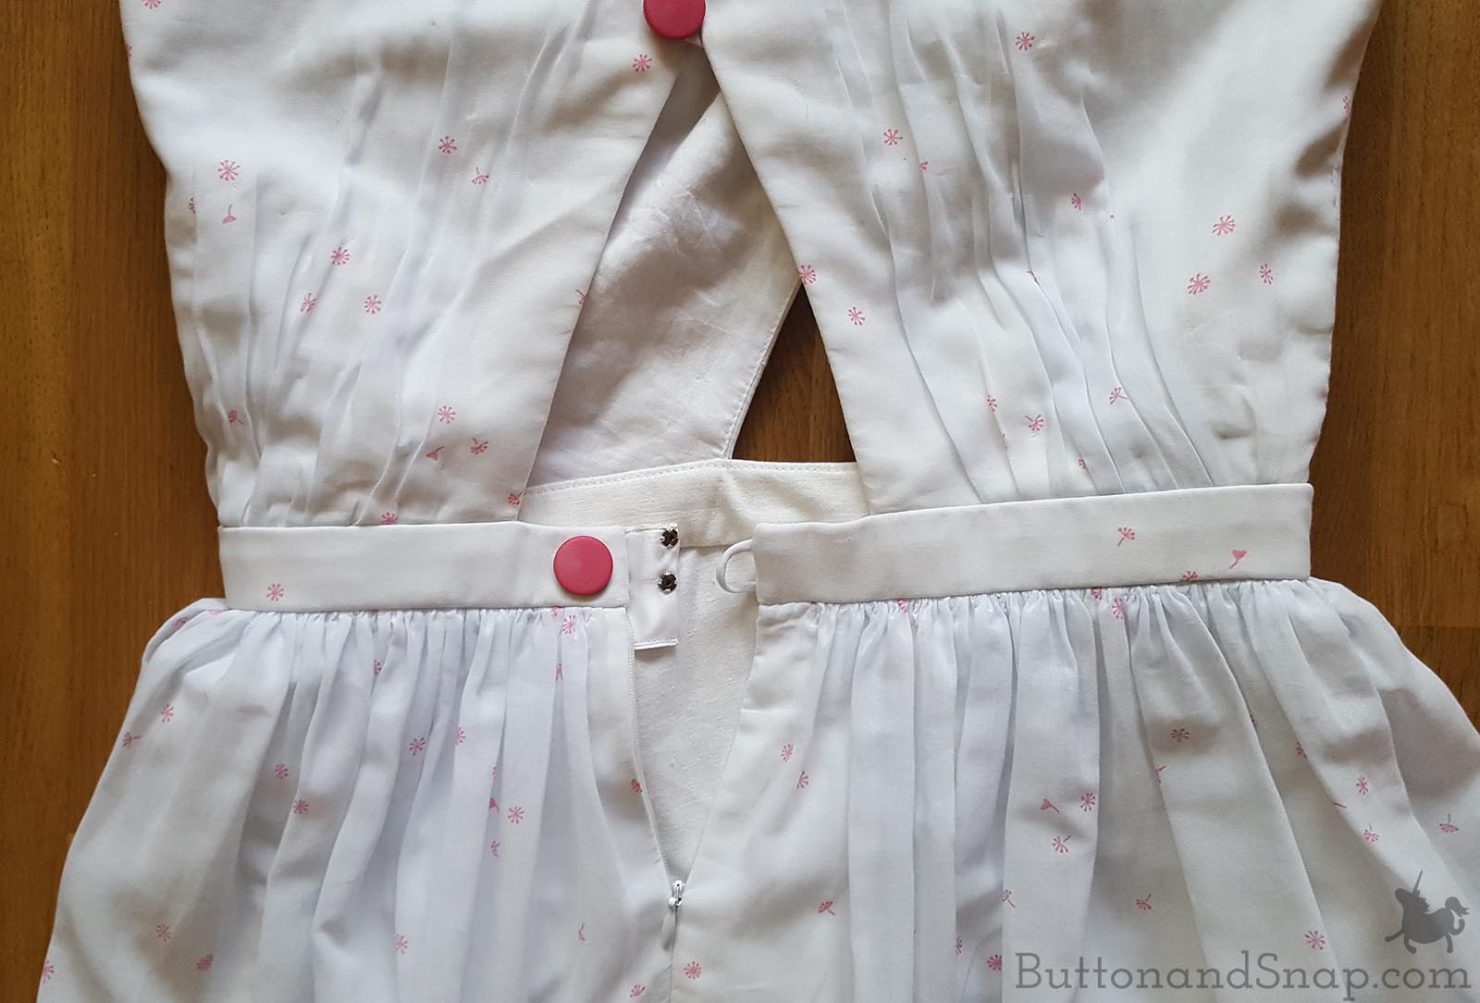
So, that’s my dress. I’m pretty excited with it – how do you like it?


Yvonne Comeau
What type of bras do you wear?
Helen
I don’t wear one with this dress. But if you want to make something similar but prefer more support, it’s actually the back cut-out, not the front, that doesn’t work with a bra.
Virginia
I love this dress! All the details are so perfectly done! And the rose is gorgeous!
Kait Kerin
Hi Helen! I really like this format of walking us through all the tailoring details. Swing tacks–who knew! Love the bodice design. How tough was it to create a pattern block?
Margaret
Beautiful dress and so romantic! I like your suggestions to use photos when fitting yourself all alone. Those husbands just aren’t much help!
Lynne
This is fabulous!! I love the front and the back of the bodice, the design is gorgeous. And what a great idea to use a circle skirt under the gathers as lining. This is such a well thought out dress, and the fit is brilliant. Happy wearing!
Kaci
Incredible work, very inspiring! I’ve been planning to draft my own blocks all year and it’s already September ?
Kathleen Ortiz
Beautiful Hellen
Love, Mrs. Ortiz.