
Knocking off: how I make a pattern from a pair of leggings
- No Comments


I want to show you how I created a new sewing pattern from a pair of leggings, using a technique called knocking off a pattern.
The basic principle behind knocking off a pattern is simple. Lay the clothing you want to trace on top of a piece of a paper. Trace the seams by poking pinholes around edge of that piece. The pinholes won’t damage the cloth, but they’ll mark the paper.
Genius, right?!
It’s best to work on a surface that’s fairly firm and flat, but that you can poke a pin into. When I worked in theatre costume shops, we had large worktables with a layer of cork on top for this purpose.
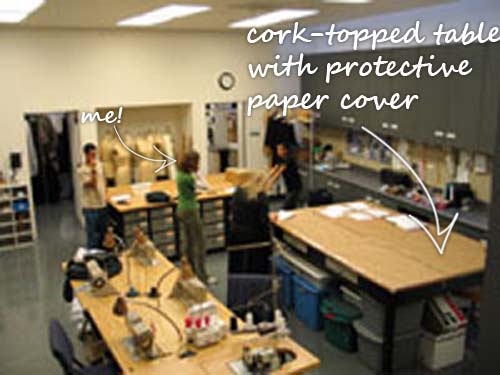
I used to improvise at home by laying projects out on a rug or a foam mattress, but since I knock off patterns regularly, I wanted a better work surface. I don’t have the budget for a cork-topped worktable, I’ve made two 2’ x 3’ cork boards that I can lay out and work on. I chose to make two so that I can lay them together to accomodate larger projects, but I can also store them easily behind my desk.
To make the boards, I used ½” thick cork and thin particle board from the local hardware store. I glued the cork onto the particle board with heavy-duty all-purpose glue. Finally, I covered them in paper to protect the cork from crumbling. The paper cover is just taped on, so when it gets too beat up I can replace it.
Here’s a close-up of the boards with and without the paper cover:

For this project, in addition to knocking the pattern off, I want to alter the pattern to eliminate the side seam from the original leggings. This adds a few extra steps, but I’ve tried to mark clearly which steps are necessary to part of knocking off a pattern and which are added for the pattern alteration.
First, I’ve laid out a large piece of paper that will become the pattern and tacked it in place. I’ve chosen to fold the paper lengthwise so that I have a double layer. This is for the pattern alteration – more on that later.

Next, I lay out the leggings. My goal is to lay the leggings so that I get one complete pattern piece laying flat. It’s important to do this gently so that I don’t stretch or otherwise distort the fabric.

Since I’m eliminating the side seam from the original leggings, I’m treating the front and back as one pattern piece. It’s impossible to lay this whole piece flat without cutting up the leggings. Instead, I’ve laid the leggings out with the side along the fold of the paper.
The front is lying completely flat, which is idea for tracing. The back is almost flat, except for a bit at the inseam that is folded towards right now. To deal with this, I’ll trace everything that’s lying flat, then move my tacks so until I can get the back inseam to lay flat, and finish up by tracing it. I’m going to trace both the front and the back on the same piece of paper. When I unfold it, I’ll have the complete pattern.
As mentioned earlier, I trace the pattern by poking pinholes because they go through the fabric and just leave marks on the paper. However instead of using a pin, I use a tool called a ponce wheel to do this more quickly. A ponce wheel looks similar to a tracing wheel, but it’s much sharper. To make the pinholes, I roll it along the seams, using short strokes so that motion of the wheel doesn’t push the fabric out of shape.

Once all the seams have been marked, I unpin the leggings and I have my paper tracing. Since the punched lines are hard to see, I sketch over them lightly with a colored pencil.

And here is the paper opened up to show the whole pattern:

**Pattern alteration side note: since I eliminated the side seam, I’ve lost some of the shaping. I dealt with this by letting part of the curve of the calf and thigh hang off the edge of the fold, as you can see up in the third picture, where I have the leggings laid out.. This eliminates these curves, but knit fabric will stretch to compensate for this.
However, the side seam on the original leggings curves in very sharply from the hip to the waist. I couldn’t put the waist on the fold or I’d remove too much fabric from the hips. For now, I’ve marked the curve along the fold as a dart so I’ll have a record of it. However, I’m planning to ignore the dart and sew up my next pair of leggings with the straight waistline. Then I can fit the waist and transfer the changes onto this pattern**
Now that I have a sketch of the pattern, I use a curve rule to smooth and sharpen the contours. To do this, I finding a part on the curve rule that matches the curve of the tracing, then I draw the curve in with a dark colored pencil.
Here, I’ve fitted the curve rule to match the bottom of the crotch curve:

Now that the bottom of the crotch curve is traced, I find a part of the curve rule that matches the top of the crotch curve, overlapping slightly with the line I’ve already drawn:

I now have the whole pattern neatly outlined.

**Pattern alteration side note: since I eliminated the side seam, I’ve lost some of the shaping. I dealt with this by letting part of the curve of the calf and thigh hang off the edge of the fold. This eliminates these curves, but knit fabric will stretch to compensate for this.
However, the side seam on the original leggings curves in so sharply at the waist that I couldn’t put the waist on the fold or I’d remove too much fabric from the hips. For now, I’ve marked the curve along the fold as sort of a dart so I’ll have a record of it. However, I’m going to ignore the dart and sew the leggings up with the straight waistline. Then I’ll figure out how to fit the waist when I make the next pair of leggings.**
If I wanted to, I could now add seam allowances to the pattern. However, I prefer patterns without seam allowances, so I’ve gone ahead and cut it out.

Time to get sewing 🙂

Leave a Reply