
The Rawest Ursula Disney-bound (with scarf tutorial!!)
- No Comments


Week 3: Bounding as Ursula
I’ve been disney-bounding with my sister Grace. Weeks 1 and 2 are here. The third Monday we’re doing Ursula from the little Mermaid. I’m the octopus version of the witch, and Grace will be my counterpart impersonating Ariel on the ship.
I’ve made the skirt, vest, and scarf. These pieces are united by a similar style: raw edges and textural details enhance a montone black palette.
Oh, I also made the jellyfish earrings out of clay. They are glow-in-the-dark!

I came up with the scarf a couple years ago after seeing something similar for sale. Making it is so easy because it involves no sewing!

It’s imporant to note that the fabric curls so that the wrong side is showing. For this reason, choose a fabric that is the same color on both sides. Also, the edges will curl only if you cut them parallel to the fabric’s stretch.
I used the alternative cut to make my scarf. In this picture of it laid out flat, an arrow points a the part where the fabric is cut around a curve. The edges don’t curl here because they they aren’t parallel to the fabric’s stretch. Since this is only a small part, it isn’t visible once you’ve got the scarf on. The square of fabric at the center (the second arrow) connects all the strips. I put it at the back and cover it with strips so it blends in.

I’ve discovered that the scarf is a good talking point when you’re on a date with a guy. Why would I wear a scarf that clearly can’t keep me warm? (The answer: Fashion! …Also, it’s better than nothing, and I wouldn’t wear this if it were super cold out.)
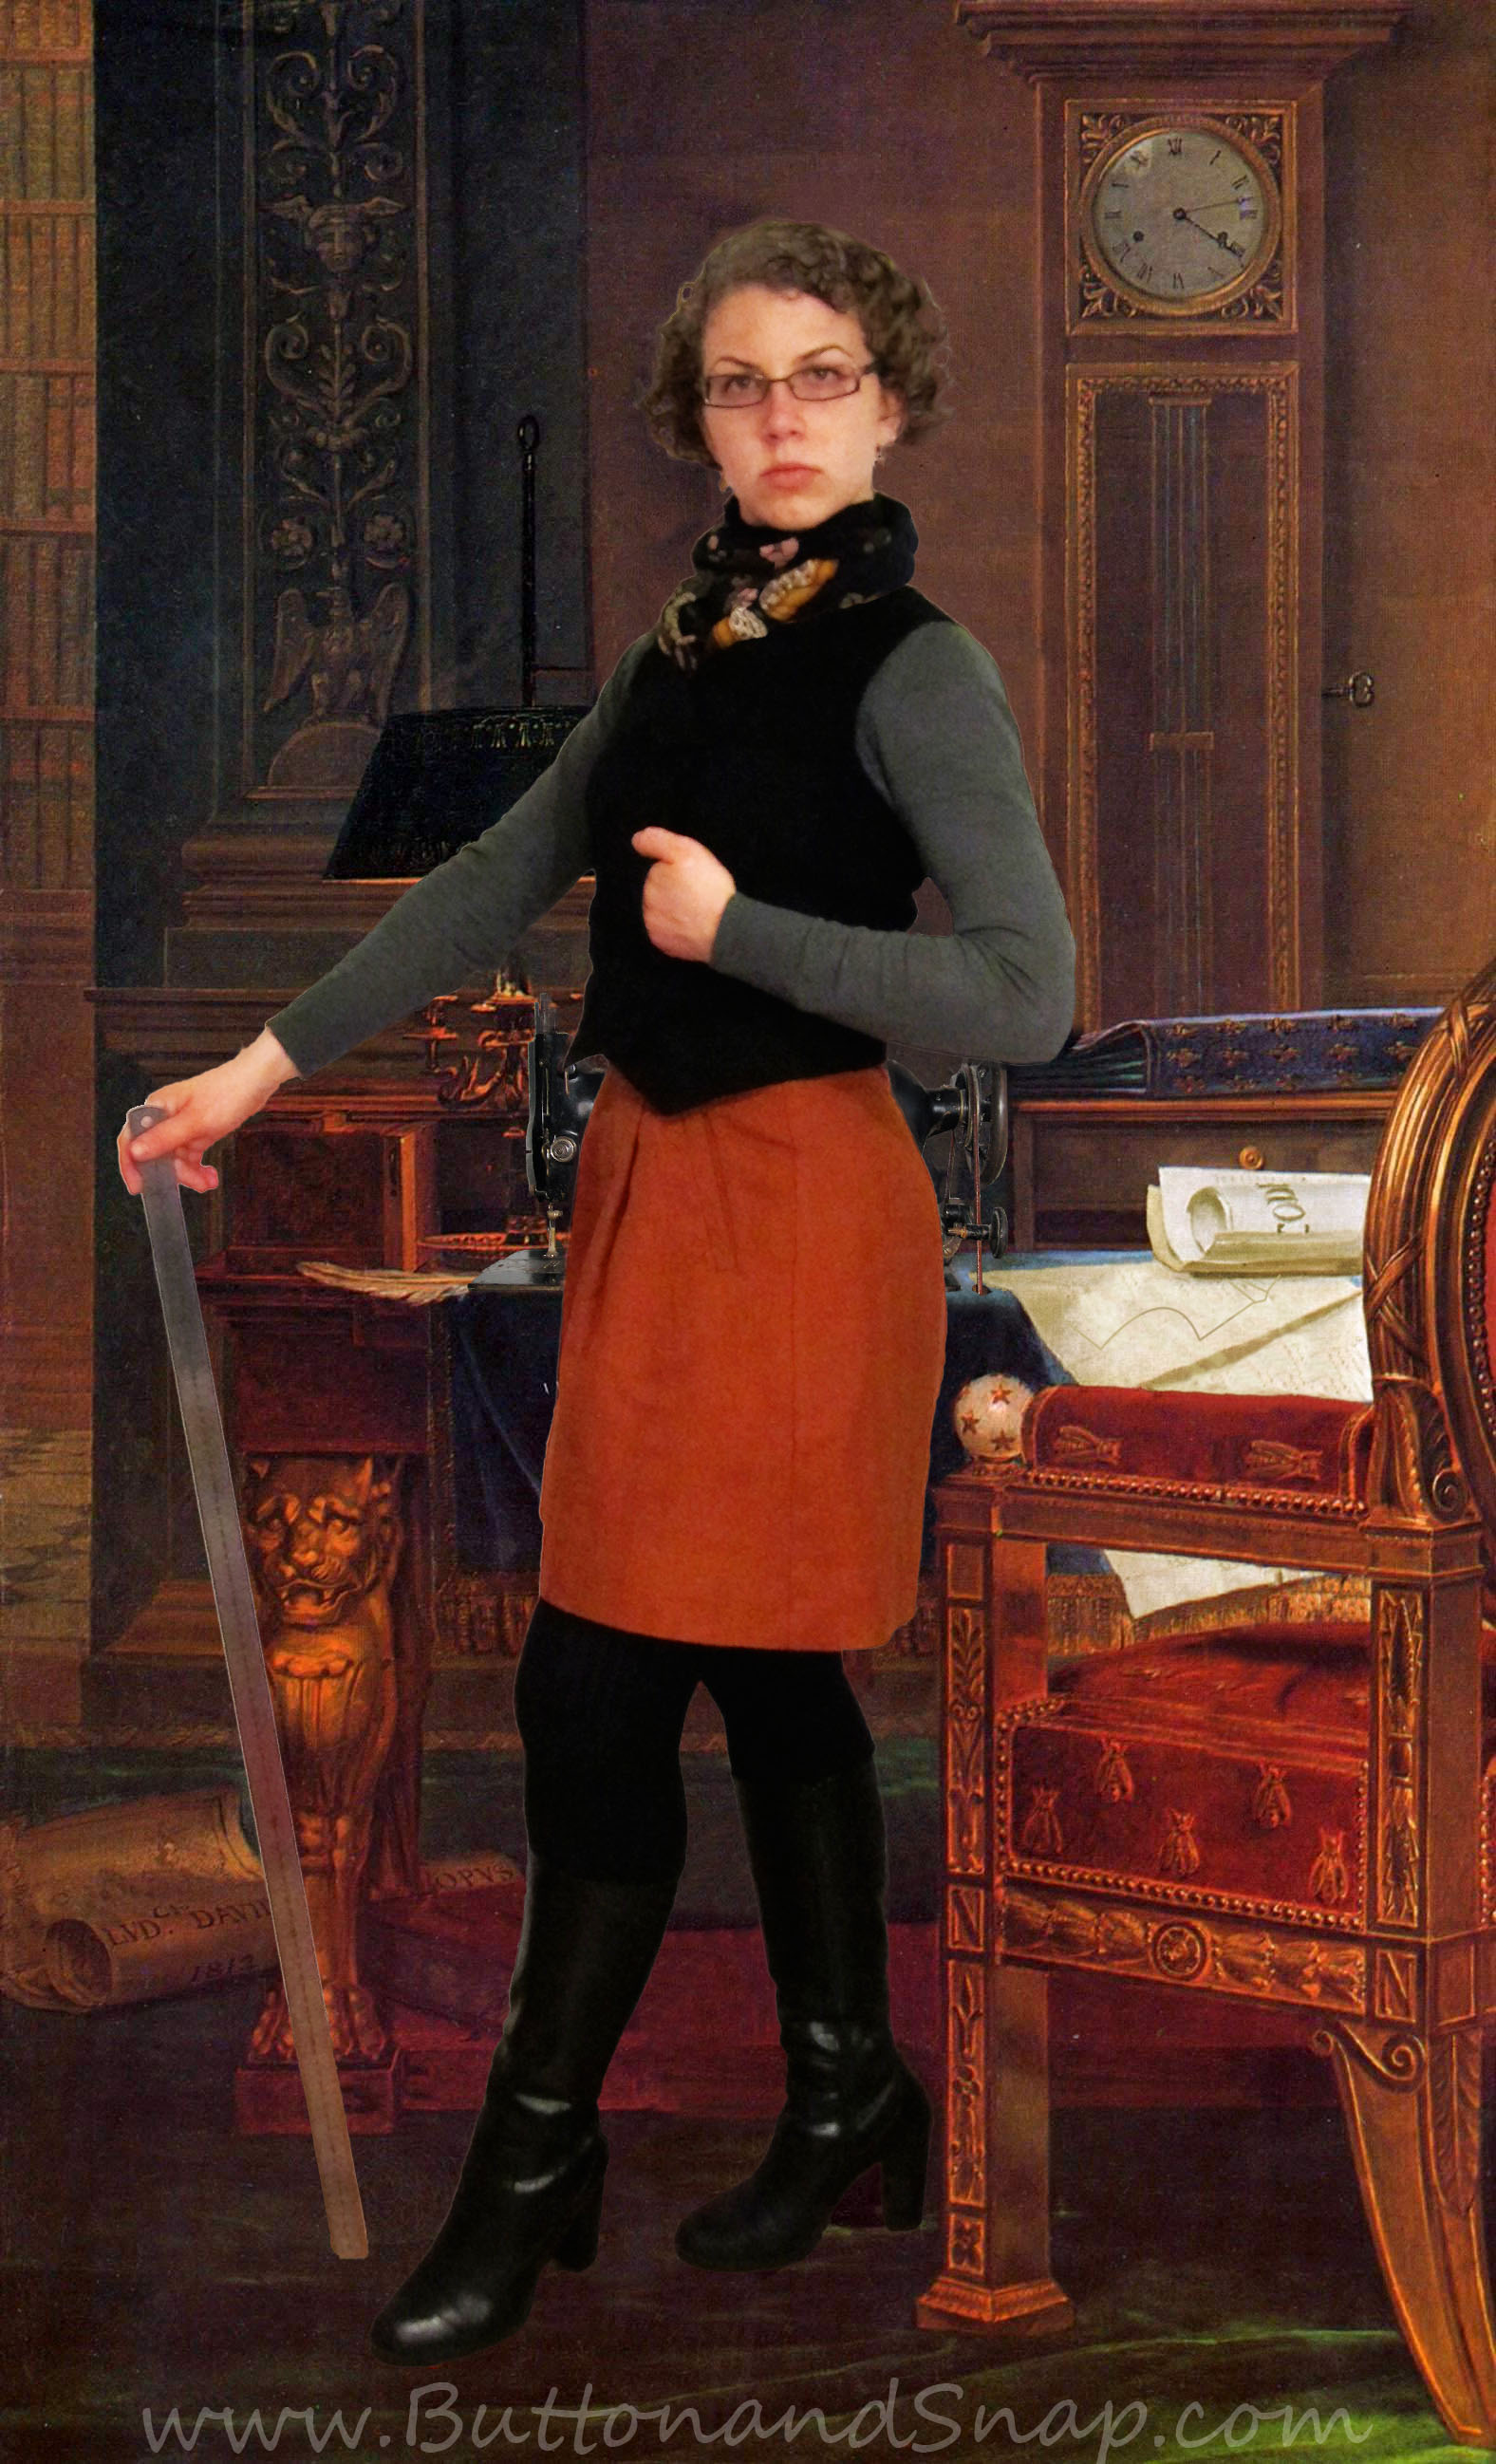
Moving on, the vest is an upcycling project. I made it from an old coat in 2012. This portrait from the original post is worth sharing. I ousted Napoleon to get that sewing room!! Can you spot all my sewing accoutrements?
I haven’t blogged about the skirt I’m wearing. It’s made of a wool knit and has seven panels. To add extra texture, I sewed the panels with wrong sides together so that the seam allowance is on the outside. I ironed the seam allowances open. Then I cut 1″ wide horizontal strips from the remaining fabric. I placed the strips along the seams with the right side facing out. Next, I sewed down the middle of the strip. Most importantly, I stretched the strip hard (just the strip, not the whole skirt) as I sewed so that the edges would curl together.

Because this treatment created bulky seams, I simply sewed a zig-zag around the hemline and left the edge raw. I also just zig-zagged elastig on at the waist.

And that’s the whole outfit! My next post will be up very soon – I bounded in a handmade vintage dress from the 1930s and I’ll be showing you lots of interesting sewing details I found inside the garment!
Leave a Reply