
Rawr!! Monster dress!


I made a new dress and it’s got monsters on it!! I’d been ogling this monster fabric in the kids’ section of the fabric for weeks, so I finally got it. Besides the new monster fabric, I made the rest of the dress by upcycling two old dresses and a skirt.

Ever the cheapskate, I bought just 3/4 of a yard of the monster fabric. It was waaay to little, and I ended up having to do some complicated trigonometry to figure out a skirt pattern that would use the fabric as efficiently as possible. I never thought I’d be using trig for sewing – guess I better thank my high school math teacher!

My favorite part of the dress is the pockets. I think they’re cute, and the gathers at the top to add some texture to the skirt. Sewing nerd detail: the pockets are finished at the top with a facing so that I didn’t have to topstitch across the gathers. Also, when I topstitched the pockets onto the skirt, I took a cue from menswear: I reinforced the top corners with triangles of topstitching since they’ll take a lot of stress. From the inside of the skirt you can see the topstitching more clearly.
 The dress is a halter top, a style I usually avoid because it’s hard to wear a bra with it.

So that I don’t need one, I built a lightweight bralette into the dress to offer extra coverage. This isn’t the best picture of the bralette because I forgot to snap it until the lining was completely attached with only a small opening to turn it. I really had to fold up the dress to turn it inside out, but hopefully you get the idea!

The bralette is cut from the same pattern as the bodice upper front. It is made from a thin layer of foam sandwiched between white jersey. I wish I could tell you where to buy this fabric; however, I salvaged it from another old dress. If you know where to buy this fabric, please tell me!
I stitched it along the bottom to the seam allowance of the lining. I didn’t have enough fabric for the bralette all the way up to the neckline, so the bra stops aboub an inch and a half below it. I tacked the top corners directly to the lining.
For extra support, I added elastic below the bust. It is attached firmly at the back zipper and runs through channels, made of ribbon, so that it can pull around as needed. I wish I had used 5/8″ elastic, but I only had 3/8″ at home.

Here’s the finished dress from the inside. The bodice lining is from an old skirt. I didn’t line the skirt because I prefer to wear a half-slip underneath the dress. The hem is serged and turned it up the barest quarter of an inch.

Here’s the finished look with the bralette.

One other detail I added for comfort was a piece of elatic at the center back neck.
 Look at how well the seams match along th zipper!

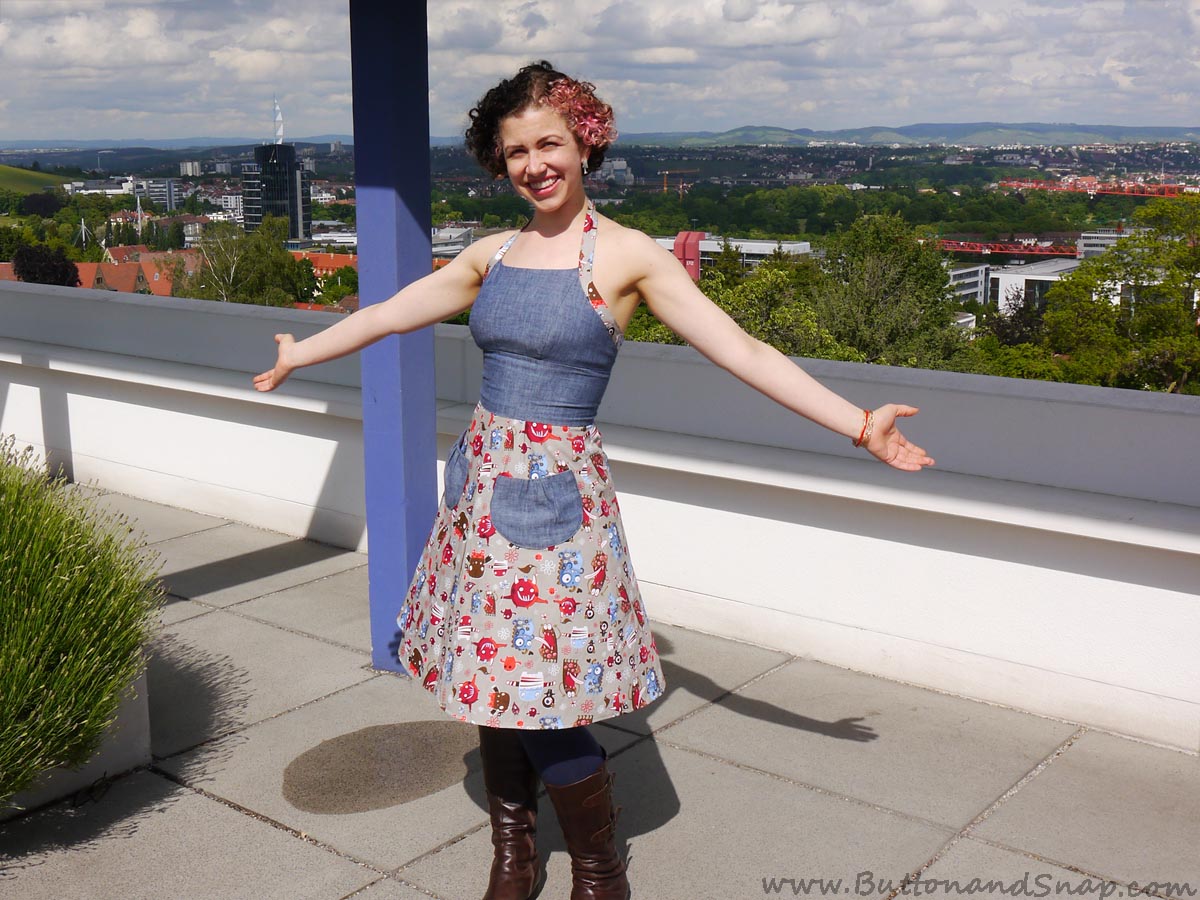
It was cold when I took the pics, so I’m wearing it with a refashioned sweater (not blogged). The beautiful view behind me is Stuttgart. My husband took an afternoon off work so we could visit the Le Corbusier House, a house built in 1927 as part of an exhibition of residential architecture for the modern middle-class man.
Boy, I wish I had a middle-class apartment like this! Even in 1927, the houses turned out too expensive for every day working people, and this building is now in one of the most expensive parts of Stuttgart.

Back on topic, here is a final picture of the dress, and with that I say “Auf Wiedersehen” and “Raaaawr!!”
elise//honigdesign
This is great! I love that you can layer it with the sweater if needed, and take it off if the sun comes out. Great job with the bralette.
Margaret
Amazing detail and precision! Thank you!